
Introduction
In this tutorial, you will learn how to integrate a React Native (Expo) app with Android Health Connect and how you can fetch Health & Fitness data directly in your app. We will use the react-native-health-connect library, which will make things easier.
More specifically, you will learn to:
- Use libraries with native code inside Expo by creating a Custom dev client
- Install and work with react-native-health-connect
- Manage app permissions to Health data on iOS
- Query health data like step counts, distance walked, flights climbed, etc.
Project
This tutorial is part of the Step Counter Project. You can check it out if you are interested in building a cross-platform Health Application by integrating it with Apple HealthKit on ios and Android Health Connect on Android.
This post only covers the Android Health Connect integration in React Native.
Video tutorial
If you prefer a video tutorial, we covered this integration live on our channel, starting at 2:20:00.
Prerequisites
For this project, we will work inside an Expo application.
You can either integrate it in your app, if you already have one, or you can initialize a blank expo app with npx create-expo-app@latest StepCounter -t and choose the "Blank (TypeScript)" template**.**
Everything is also compatible with bare React Native application, if you are not using Expo. Check the documentation of our packages for extra installation steps for bare React Native apps.
Let’s prepare our project
Let’s set up all the files, and the basic structure of our app, to prepare for the Health Integration.
To keep our project clean, I want to separate all the logic related to "how we get the data" from HealthKit. For that, let’s define a custom hook, that will handle all the HealthKit integration, and will simply return the data our app needs using the hook:
const {steps, distance, flights} = useHealthData();
For that, let’s create our custom hook inside src/hooks/useHealthData.ts that will fetch and store the health data.
import { useEffect, useState } from 'react';const useHealthData = () => {const [steps, setSteps] = useState(0);const [flights, setFlights] = useState(0);const [distance, setDistance] = useState(0);// HealthKit implementationreturn { steps, flights, distance };};export default useHealthData;
Now, import this hook where you need it (ex: in App.tsx), and use the data to render it in your UI.
import useHealthData from './src/hooks/useHealthData';export default function App() {const {steps, distance, flights} = useHealthData();console.log(`Steps: ${steps} | Distance: ${distance}m | Flights: ${flights}`);return (...)}
If you are following the Step Counter Project, you can render the values on the screen using the <Value /> component.
<Value label="Steps" value={steps.toString()} /><Value label="Distance" value={`${(distance / 1000).toFixed(2)} km`} /><Value label="Flights Climbed" value={flights.toString()} />
Also, if you have the RingProgress component, you can render the progress based on the number of steps divided by the goal (ex: 10000 steps a day).
<RingProgress progress={steps / 10000} />
React Native - Android Health Connect integration
Android has introduced a central Health App called: Health Connect. Other health & fitness apps will be able to integrate with it to write and read health data.
At the moment, the app should be installed from Play Market, and it is still in Beta. In the future, we expect this app to be pre-installed on Android devices.
To interact with Android’s Health Connect API, we will use the library: react-native-health-connect
Download and setup the Android Health Connect app
This project depends on the Android Health Connect app. Download it from Play Store and configure this app on either your physical device or on the emulator that you are using.
At this moment, you might not have any data in the Health Connect app. If that’s the case, you would want to generate some test data.
Health Connect Toolbox app can help you with that. Follow this guide to install the app. Then add some testing data for steps, floors climbed, and distance.
Install react-native-health-connect
Let’s start by installing the library in our project:
npm install react-native-health-connect
For the expo project, let’s start by installing it using:
React Native Health Connect library contains native code. That means that when running our app inside Expo Go, the native code that we depend on will not be included.
This is not a problem. All we have to do is create a custom development client.
Create a custom dev client
Think about the custom development client as your own version of the Expo Go app that will include all the native code your app includes. This allows us to use libraries that have native code inside our Expo apps.
All we have to do is install the expo-dev-client library
npx expo install expo-dev-client
Then, we can build our native project and run it on a device with the command
npx expo run:android
Press enter to accept the default package name, and wait for the native project to be built.
At this moment the build should fail. That’s ok.
The problem is that the react-native-health-connect library requires the minSdkVersion=26 but by default, our expo app is using a lower SDK version.
Change the Android SDK version for an Expo app
Using Expo BuildProperties we can easily change the build properties from androiud/gradle.properties and ios/Podfile.properties.json.
Let’s install it
npx expo install expo-build-properties
And change the build properties, inside app.json
{"expo": {"plugins": ["react-native-health",["expo-build-properties",{"android": {"compileSdkVersion": 33,"targetSdkVersion": 33,"buildToolsVersion": "33.0.0","minSdkVersion": 26}}]]}}
Let’s clean our Android folder and then build the project again
npx expo prebuild --platform android --cleannpx expo run:android
Now our project should build and run successfully on an Android emulator, or even on your physical device (for that, run npx expo run:android -d).
Manage Android Permissions
In Android, permissions are managed inside the Android manifest file. With expo, we manage them inside app.json file, under expo → android → permissions.
Add these permissions to app.json. For a full list of permissions that you can request, check out the docs.
{"expo": {..."android": {..."permissions": ["android.permission.health.READ_STEPS","android.permission.health.READ_FLOORS_CLIMBED","android.permission.health.READ_DISTANCE"]},...}}
However, that is not everything we have to change in the Android manifest file to configure Health Connect. We should also add an intent filter for the Permissions modal. We can do this, using a custom expo config plugin.
Let’s create the config plugin as a new file androidManifestPlugin.js in the root directory, and add the next code that will add a new intent filter.
const { withAndroidManifest } = require('@expo/config-plugins');module.exports = function androidManifestPlugin(config) {return withAndroidManifest(config, async (config) => {let androidManifest = config.modResults.manifest;androidManifest.application[0].activity[0]['intent-filter'].push({action: [{$: {'android:name': 'androidx.health.ACTION_SHOW_PERMISSIONS_RATIONALE',},},],});return config;});};
Then, we have to add this custom plugin to our app, by adding it to the plugins inside app.json
{"expo": {..."plugins": ["./androidManifestPlugin.js",...]}}
Now, let’s do a clean prebuild with npx expo prebuild --platform android --clean and then run the project again with npx expo run:android
Initialize Health Connect
Now that the library is configured, we can start using it in our app. Let’s open useHealthData.ts file, and start by initializing react-native-health-connect.
import {initialize,requestPermission,readRecords,} from 'react-native-health-connect';import { Permission } from 'react-native-health-connect/lib/typescript/types';import { TimeRangeFilter } from 'react-native-health-connect/lib/typescript/types/base.types';const useHealthData = () => {...const [androidPermissions, setAndroidPermissions] = useState<Permission[]>([]);useEffect(() => {if (Platform.OS !== 'android') {return;}const init = async () => {// initialize the clientconst isInitialized = await initialize();if (!isInitialized) {console.log('Failed to initialize Health Connect');return;}// request permissionsconst grantedPermissions = await requestPermission([{ accessType: 'read', recordType: 'Steps' },{ accessType: 'read', recordType: 'Distance' },{ accessType: 'read', recordType: 'FloorsClimbed' },]);setAndroidPermissions(grantedPermissions);};init();}, []);}
As you can see above, when the component mounts, in a useEffect, we are first checking if the app is running on Android. Then, we call the init function, which will initialize the library and will also request the necessary permissions. We save the permissions in state, to be able to check later what data we have access to.
On your device or emulator, we should already see the modal that requests permissions. Make sure to give all the permissions, and let’s follow along.
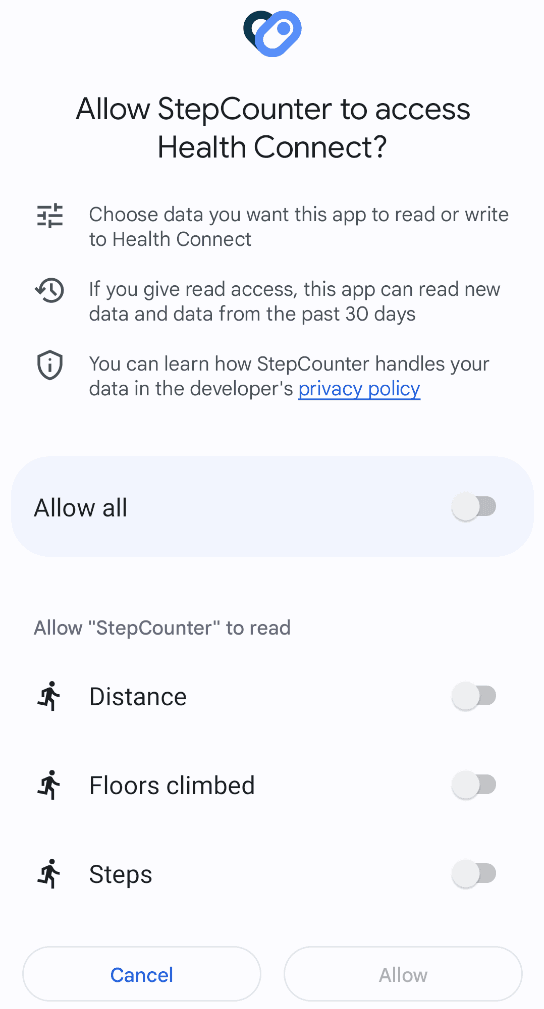
The androidPermissions will be an array that contains all the data points we already have access. It will look something like this:
[{"accessType": "read", "recordType": "FloorsClimbed"},{"accessType": "read", "recordType": "Distance"},{"accessType": "read", "recordType": "Steps"}]
Let’s create a helper function that will check if we have specific permission. We will need it in a moment.
const hasAndroidPermission = (recordType: string) => {return androidPermissions.some((perm) => perm.recordType === recordType);};
Get step count from Health Connect
Now that we have the necessary permissions, we can query the step count.
useEffect(() => {if (!hasAndroidPermission('Steps')) {return;}const getHealthData = async () => {const today = new Date();const timeRangeFilter: TimeRangeFilter = {operator: 'between',startTime: new Date(today.getTime() - 86400000).toISOString(),endTime: today.toISOString(),};// Stepsconst steps = await readRecords('Steps', { timeRangeFilter });const totalSteps = steps.reduce((sum, cur) => sum + cur.count, 0);setSteps(totalSteps);};getHealthData();}, [androidPermissions]);
Let’s dissect what’s going on here.
We have the useEffect, which is triggered every time androidPermissions change.
We first check if we don’t have access to the Steps datapoint, and we stop there.
We define the async getHealthData function, and we call it right away.
To read data from health connect, we have to send the filter. For the filter, we will create a time range filter for the last 24 hours.
The next step is to actually read the records.
const steps = await readRecords('Steps', { timeRangeFilter });
The result will be an array with multiple entries. If you have to show these entries on a graph, that would be useful. What we are interested in, is the total number of steps, that we calculate using a reducer:
const totalSteps = steps.reduce((sum, cur) => sum + cur.count, 0);
That’s it. That’s how we read health data using react-native-health-connect.
Get distance and floors climbed
Let’s do the same for the distance and floors climbed. You can create new useEffects for them, or you can add the next calls after we query the steps. In that case, we will reuse the same timeRangeFilter.
// Distanceconst distance = await readRecords('Distance', { timeRangeFilter });const totalDistance = distance.reduce((sum, cur) => sum + cur.distance.inMeters,0);setDistance(totalDistance);// Floors climbedconst floorsClimbed = await readRecords('FloorsClimbed', {timeRangeFilter,});const totalFloors = floorsClimbed.reduce((sum, cur) => sum + cur.floors,0);setFlights(totalFloors);
Demo
In the end, you should see the information about the steps, distance walked and flights climbed on the screen.
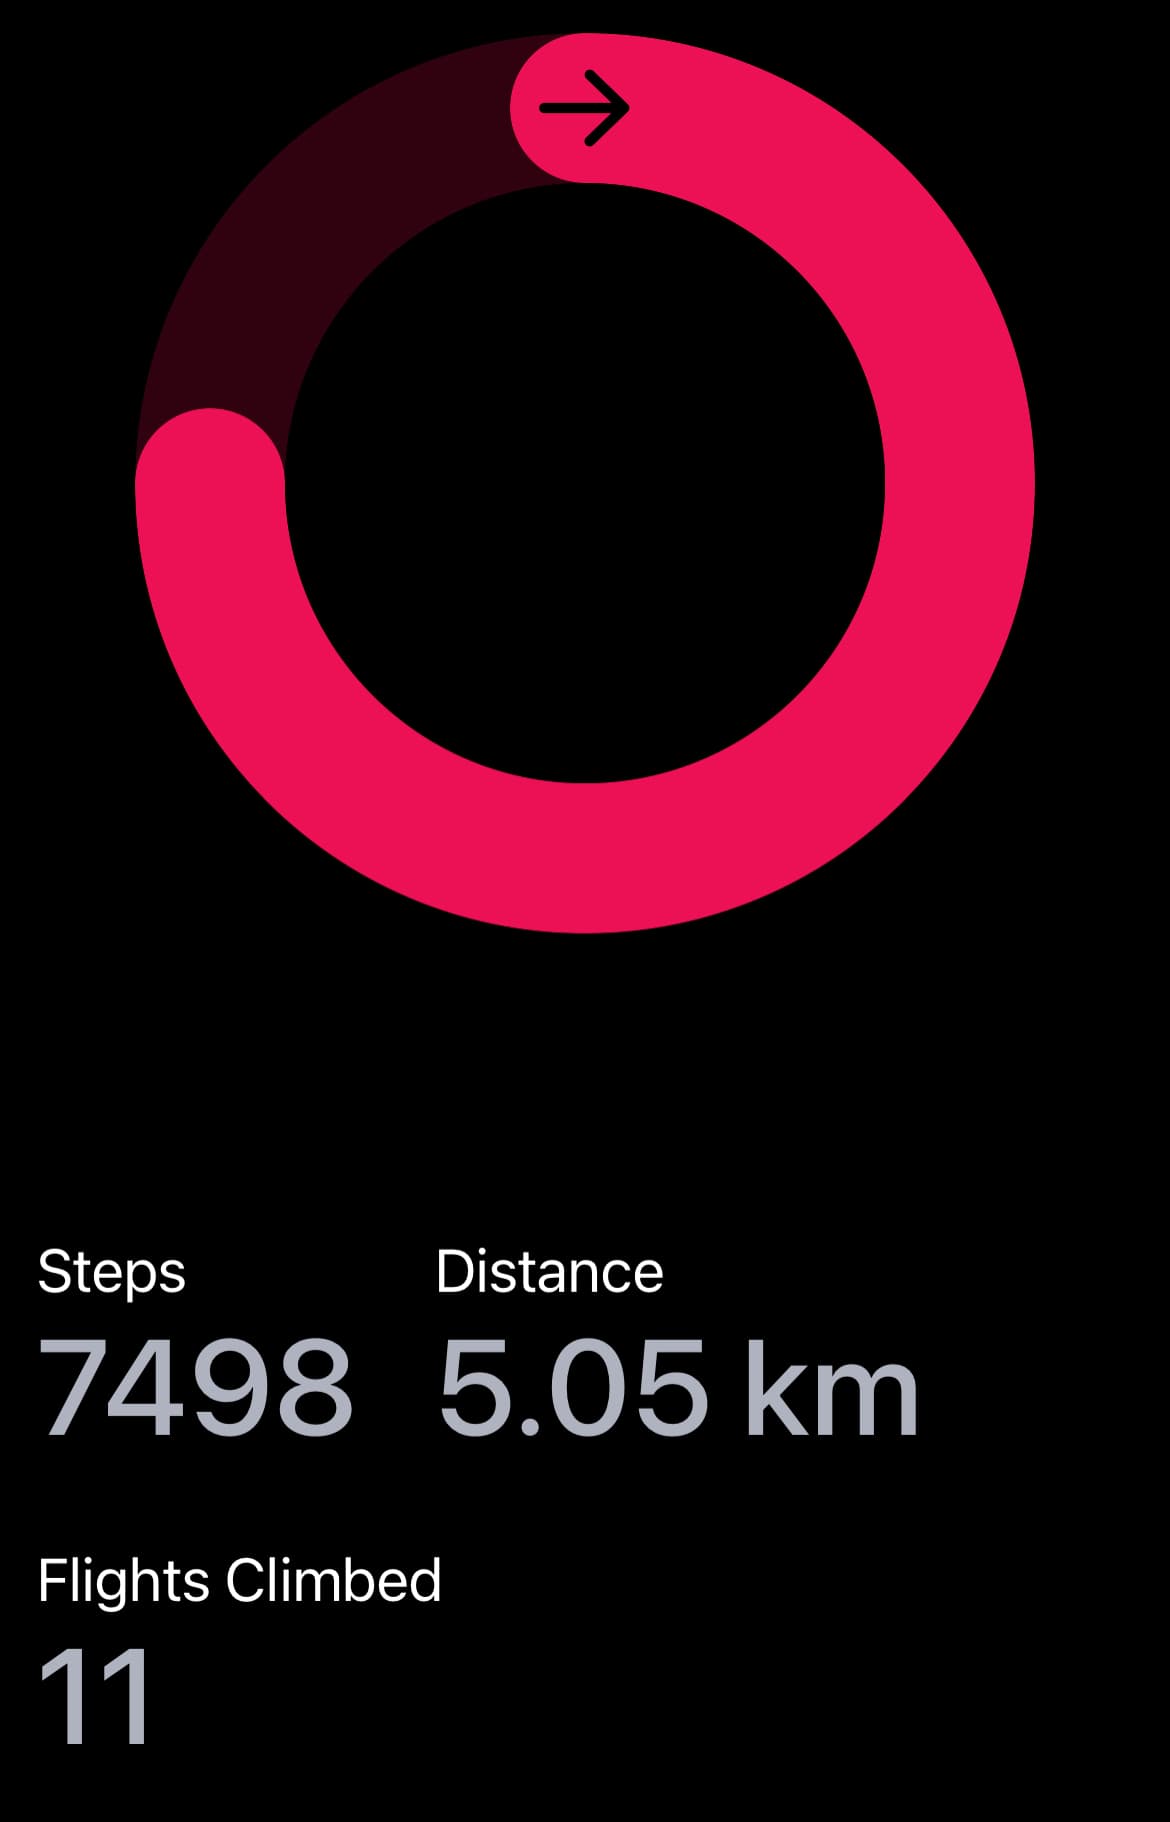
Check other episodes from the Health Application with React Native: Step Counter series