
Introduction
Let’s build a fully-fledged Chat application with React Native and Stream Chat SDK. Shall we?
You can follow this build in video format here:
If you want to follow along, and build this application yourself, make sure to download the Asset bundle that contains all the dummy data, pre-defined components, PDF presentation and more.
Download the Asset Bundle 👇
To get the Source Code, PDF guide, dummy data, images, etc.
Context
This project is part of the notJust.Hack event, and the goal is to show you that it is possible to build a functional full-stack application in just 3 days.
During the first workshop, we built the UI of a Virtual Events Application. During the second workshop we have implemented the backend side (authentication, database, graphql api).
The goal for today
Most applications can benefit from in-app messaging experience, however building a premium experience, similar to what you get from apps like Whatsapp, Signal, etc., is a challenging task even for experienced developers.
Not anymore. With Stream Chat SDK you can implement a full-fledged messaging experience, in hours.
That’s exactly what we are going to do during today’s workshop.
We will build a premium messaging experience for our Virtual Events app 📅
✅ Private and Group messaging
✅ Message reaction
✅ Replies & Threads
✅ Attachements, URL previews, gifs
✅ and more
This workshop is sponsored by Stream, which powers Chat Messaging and Activity Feeds for billions of global end-users across thousands of different apps.
Let’s get started with Stream
Let’s start by creating a Stream account.
The Stream Maker Account provides qualifying teams with full and free access to Stream's Chat and Activity Feed APIs, making them accessible to side projects and new startups. No credit card is required. Try Stream for Free!
Create a new app
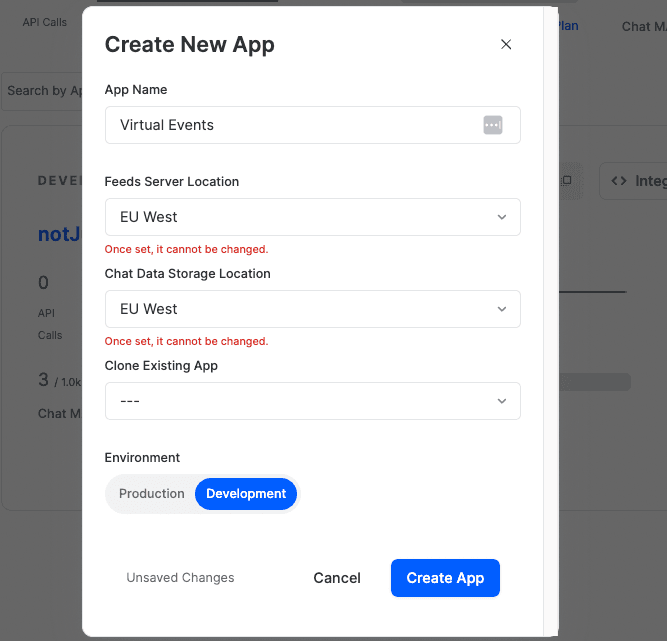
Create a new Stream App
Install
Follow the Stream installation guide for expo: https://getstream.io/chat/docs/sdk/reactnative/#expo-installation
- Install stream-chat-expo
npx expo install stream-chat-expo
- Install additional deps
npx expo install @react-native-community/netinfo expo-av expo-document-picker expo-file-system expo-haptics expo-image-manipulator expo-image-picker expo-media-library expo-sharing react-native-gesture-handler react-native-reanimated react-native-svg
- Optional dependecies
npx expo install expo-av expo-clipboard
Make sure to follow these additional steps for some of the libraries we installed.
Prepare the Chat screens
- Create a blank component for the Chats Screen inside screens/Chat/ChatsScreen.tsx
- Create a new Stack Navigator for the Chat Screens inside navigation/ChatStackNavigator.tsx
import { createNativeStackNavigator } from '@react-navigation/native-stack';import ChatsScreen from '../screens/Chat/ChatsScreen';const Stack = createNativeStackNavigator();export default () => {return (<Stack.Navigator><Stack.Screen name="Chats" component={ChatsScreen} /></Stack.Navigator>);};
- Add the ChatStackNavigator as a tab inside BottomTabNavigator from navigation/index.tsx
<BottomTab.Screenname="Chat"component={ChatStackNavigator}options={{headerShown: false,tabBarIcon: ({ color }) => (<Ionicons name="chatbox-ellipses-outline" size={25} color={color} />),}}/>
Chat Context
- Create a new ChatContext.tsx
import React, { createContext, useContext } from 'react';type ChatContextType = {};const ChatContext = createContext < ChatContextType > {};const ChatContextProvider = ({ children }: { children: React.ReactNode }) => {const value = {};return <ChatContext.Provider value={value}>{children}</ChatContext.Provider>;};export const useChatContext = () => useContext(ChatContext);export default ChatContextProvider;
- And wrap our Chat Navigation Screens inside the ChatContextProvider
Connect the user to the chat client
- In the ChatContextProvider let’s first setup the Stream Chat client
import { StreamChat } from 'stream-chat';
- Now, let’s connect the user using the information from the Authenticated user
const user = useUserData();const [chatClient, setChatClient] = useState<StreamChat>();const [currentChannel, setCurrentChannel] = useState<Channel>();useEffect(() => {const initChat = async () => {if (!user) {return;}const client = StreamChat.getInstance("APP key");await client.connectUser({id: user.id,name: user.displayName,image: user.avatarUrl,},client.devToken(user.id));setChatClient(client);};if (!chatClient) {initChat();}}, [user?.id]);useEffect(() => {return () => {chatClient?.disconnectUser();setChatClient(undefined);};}, []);const value = { chatClient, currentChannel, setCurrentChannel };
- Enable Dev token
Create the global Channel
const globalChannel = client.channel('livestream', 'global', {name: 'notJust.dev',});await globalChannel.watch({ watchers: { limit: 100 } });setChatClient(client);
UI Components
- Wrap all the children of the Chat Context Provider with the OverlayProvider and Chat components
return (<ChatContext.Provider value={value}><OverlayProvider><Chat client={chatClient}>{children}</Chat></OverlayProvider></ChatContext.Provider>);
- Display the ChannelList inside screens/ChatScreens/ChatsScreen.tsx
import { useNavigation } from '@react-navigation/native';import React from 'react';import { ChannelList } from 'stream-chat-expo';import { useChatContext } from '../../context/ChatContext';const ChatsScreen = () => {const { setCurrentChannel } = useChatContext();const navigation = useNavigation();const onSelect = (chanel) => {setCurrentChannel(chanel);navigation.navigate('ChatRoom');};return <ChannelList onSelect={onSelect} />;};export default ChatsScreen;
Channel page
- Display the Channel, MessageList and MessageInput components in screens/ChatScreens/ChatRoomScreen.tsx
import React from 'react';import { Channel, MessageInput, MessageList } from 'stream-chat-expo';import { useChatContext } from '../../context/ChatContext';const ChatRoomScreen = () => {const { currentChannel } = useChatContext();return (<Channel channel={currentChannel}><MessageList /><MessageInput /></Channel>);};export default ChatRoomScreen;
Private messages
- Move the UsersScreen inside the ChatStackNavigator
- Inside the UserListItem.tsx add the onPress event that will create a new chat room with that user, and then, will redirect there
const { chatClient, setCurrentChannel } = useChatContext();const navigation = useNavigation();const handleStartChat = async () => {if (!chatClient?.userID) return;try {const newChannel = chatClient.channel('messaging', {demo: 'virtual-event',members: [chatClient.userID, user.id],});await newChannel.watch();setCurrentChannel(newChannel);navigation.goBack();navigation.navigate('ChatRoom');} catch (err) {console.log(err);}};
Group messaging
Let’s create a group chat room for every event we have.
When the user will Join an event, we will join the chat room associated with that event as well.
Let’s create the joinEventChatRoom function inside our ChatContext and export it through the context.
const joinEventChatRoom = async (event) => {if (!chatClient) {return;}const channelId = `room-${event.id}`;const eventChannel = chatClient.channel('livestream', channelId, {name: event.name,});await eventChannel.watch({ watchers: { limit: 100 } });setCurrentChannel(eventChannel);navigation.navigate('Root', {screen: 'Chat',});navigation.navigate('Root', {screen: 'Chat',params: { screen: 'ChatRoom' },});};
In the ModalScreen.tsx add a new button the will call the joinEventChatRoom
const { joinEventChatRoom } = useChatContext();...<CustomButtontext="Join the conversation"onPress={() => joinEventChatRoom(event)}/>
To have access the the ChatContextProvider , we have to wrap all the screens (except auth screens). For that, move the ChatContextProvider from ChatStackNavigator to navigation/index.tsx inside the RootNavigator.
Hurray 🎉
Congrats, you have successfully build a chatting mobile application using React Native and Stream Chat SDK.
I hope you found this workshop valueble and if you ever need chatting functionalities in your app, you know where to look for.
The Stream Maker Account provides qualifying teams with full and free access to Stream's Chat and Activity Feed APIs, making them accessible to side projects and new startups. No credit card is required. Try Stream for Free!