
Introduction
In this tutorial, we will build a full-stack Spotify clone by integrating directly with Spotify API.
For the mobile app, we will build a React Native app using Expo and Expo Router.
For the backend, we will build a thin GraphQL Layer on top of the Spotify API using StepZen.
We will cover quite a wide range of tools and technologies in this build. There will be something new to learn for everyone, no matter your experience.
If you are a beginner, you can also follow the build as I try to explain every single step we do.
Video tutorial
This guide was designed to be used together with the video tutorial. Open it in a new tab, and let’s get started.
Asset Bundle
The Asset bundle contains all the required assets to help you follow along.
Download Asset BundleReact Native App
Setup a new Expo project
Let’s start by creating a new React Native application using Expo. We will use the Navigation (TypeScript) template, which comes with Expo Router configures, and a couple of sample screens.
npx create-expo-app@latest SpotifyClone -t
After the project is initialized, let’s open it up in our editor of choice.
Open a terminal, and start the development server with npm start
The next step is to run our app on a device. The easiest way is to download the Expo Go app (available both on Play Market and App Store), and then scan the QR you see in the terminal. That way, you can continue to develop the app and see the hot updates directly on your device.
Optionally, you can run the app on an iOS Simulator by pressing i or on Android Emulator by pressing a. But for this, you have to set up the emulators using Xcode and/or Android Studio.
Clean the template
Let’s clean up a bit the default template to make our work easier later.
- Move the folders app, components, and constants inside a new src directory to keep everything close together.
- Fix all the imports
- Copy and paste the types.ts file from the asset bundle to your project src/types.ts
- Remove unused components
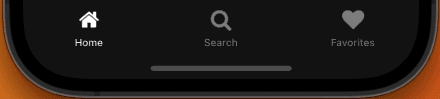
While we are still here, let’s setup our tabs that we will need today.
Home screen: a list of recommended tracks
On the home screen, we will render a list of tracks.
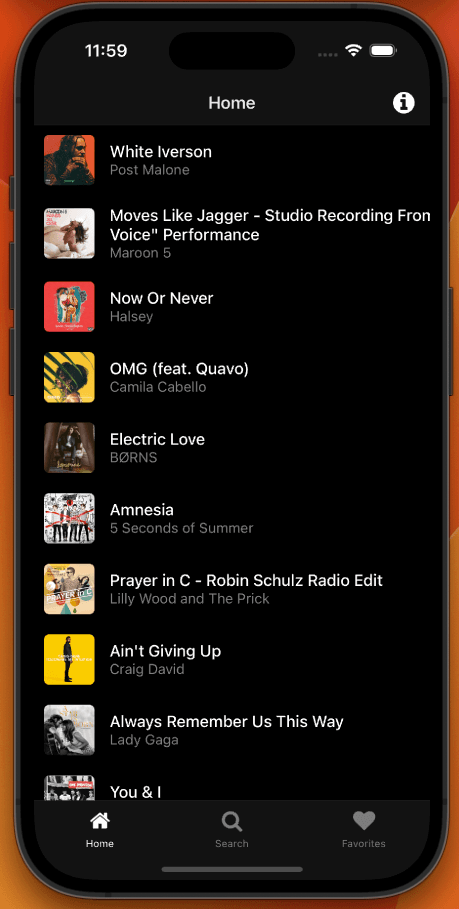
A bit later in the tutorial, the data for this list will be fetched directly from Spotify API using their recommendation algorithm. For now, let’s use the dummy data from the asset bundle.
In the file data/tracks.ts you will see a list of tracks, in a similar format that we will receive from the API. Let’s import it on the home screen (src/app/(tabs)/index.tsx) and render a FlatList of tracks based on these items
import { FlatList } from 'react-native';import TrackListItem from '../../components/TrackListItem';import { tracks } from '../../../assets/data/tracks';export default function HomeScreen() {return (<FlatListdata={tracks}renderItem={({ item }) => <TrackListItem track={item} />}/>);}
Track List Item
Let’s create a new component that will render the information about one track.

import { View, Text, StyleSheet, Pressable, Image } from 'react-native';import { Track } from '../types';type TrackListItemProps = {track: Track;};const TrackListItem = ({ track }: TrackListItemProps) => {const image = track.album?.images?.[0];return (<PressableonPress={() => console.log('Playing track: ', track.id)}style={styles.container}>{image && <Image source={{ uri: image.url }} style={styles.image} />}<View><Text style={styles.title}>{track.name}</Text><Text style={styles.subtitle}>{track.artists[0]?.name}</Text></View></Pressable>);};const styles = StyleSheet.create({container: {width: '100%',padding: 10,gap: 5,flexDirection: 'row',alignItems: 'center',},title: {fontWeight: '500',color: 'white',fontSize: 16,},subtitle: {color: 'gray',},image: {width: 50,aspectRatio: 1,marginRight: 10,borderRadius: 5,},});export default TrackListItem;
Saved Tracks Screen
This screen will display a list of tracks you saved. Later we will fetch this information from the api, but for now, we can duplicate the same FlatList as we have on the Home Screen.
Search Screen
The search screen will also render a FlatList of items, but it will also have a search Input at the top. Also, make sure to hide the header of this page.
export default function SearchScreen() {const [search, setSearch] = useState('');return (<SafeAreaView style={styles.container}><View style={styles.header}><FontAwesome name="search" size={16} color="gray" /><TextInputvalue={search}placeholder="What do you want to listen to?"onChangeText={setSearch}style={styles.input}/><Text>Cancel</Text></View><FlatListdata={tracks}renderItem={({ item }) => <TrackListItem track={item} />}/></SafeAreaView>);}const styles = StyleSheet.create({container: {flex: 1,},header: {flexDirection: 'row',alignItems: 'center',},input: {backgroundColor: '#121314',color: 'white',flex: 1,marginHorizontal: 10,padding: 8,borderRadius: 5,},});
Music Player
The main purpose of this application is to play audio tracks. Let’s work on the music player, that will be displayed above our bottom tabs and will be responsible for playing the music.
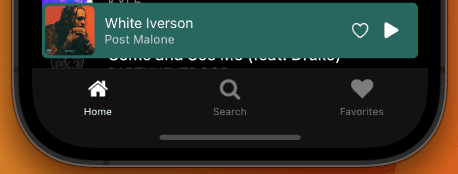
Let’s start with defining the Player component inside src/components/Player.tsx
import { View, Text, StyleSheet, Image } from 'react-native';import { Ionicons } from '@expo/vector-icons';import { tracks } from '../../assets/data/tracks';const track = tracks[0];const Player = () => {if (!track) {return null;}const image = track.album.images?.[0];return (<View style={styles.container}><View style={styles.player}>{image && <Image source={{ uri: image.url }} style={styles.image} />}<View style={{ flex: 1 }}><Text style={styles.title}>{track.name}</Text><Text style={styles.subtitle}>{track.artists[0]?.name}</Text></View><Ioniconsname={'heart-outline'}size={20}color={'white'}style={{ marginHorizontal: 10 }}/><Ioniconsdisabled={!track?.preview_url}name={'play'}size={22}color={track?.preview_url ? 'white' : 'gray'}/></View></View>);};const styles = StyleSheet.create({container: {position: 'absolute',width: '100%',top: -75,height: 75,padding: 10,},player: {backgroundColor: '#286660',flex: 1,flexDirection: 'row',alignItems: 'center',borderRadius: 5,padding: 3,paddingRight: 15,},title: {color: 'white',},subtitle: {color: 'lightgray',fontSize: 12,},image: {height: '100%',aspectRatio: 1,marginRight: 10,borderRadius: 5,},});export default Player;
Now, how do we always render it on top of the bottom tab bars?
We will take advantage of the possibility to override the Tab Bar components of the bottom tabs, and simply append the player on top of it. To do that, inside src/app/(tabs)/_layout.tsx change
<TabsscreenOptions={{tabBarActiveTintColor: Colors[colorScheme ?? 'light'].tint,}}tabBar={(props) => (<View><Player /><BottomTabBar {...props} /></View>)}>...
Player data provider
We want to update the active track that is played by the player when we press on a TrackListItem. That means, that we need to store somewhere globally what is the current active track. For that, we will use a React Context, that we will create in src/providers/PlayerProvider.tsx
import { PropsWithChildren, createContext, useContext, useState } from 'react';import { Track } from '../types';type PlayerContextType = {track?: Track;setTrack: (track: Track) => void;};const PlayerContext = createContext<PlayerContextType>({track: undefined,setTrack: () => {},});export default function PlayerProvider({ children }: PropsWithChildren) {const [track, setTrack] = useState<Track>();return (<PlayerContext.Provider value={{ track, setTrack }}>{children}</PlayerContext.Provider>);}export const usePlayerContext = () => useContext(PlayerContext);
Now, inside the TrackListItem, we can import the setTrack function, and call it when we click on the item
const { playTrack } = usePlayerContext();...<Pressable onPress={() => playTrack(track)} style={styles.container}>
And from the Player component, we can import the active track from the context
const { track } = usePlayerContext();
Playing Audio with Expo AV
We will use Expo AV to play the audio tracks, so let’s install it
npx expo install expo-av
Now, let’s use the Audio module inside our player
const Player = () => {const [sound, setSound] = useState<Sound>();useEffect(() => {playTrack();}, [track]);const playTrack = async () => {if (sound) {await sound.unloadAsync();}if (!track?.preview_url) {return;}const { sound: newSound } = await Audio.Sound.createAsync({uri: track.preview_url,});setSound(newSound);await newSound.playAsync();};
Now, changing the active track should play the sound (if only the track has preview_url)
Go ahead and try to implement the play/pause features based on the documentation. Or check out how we do it during the livestream.
What’s next?
Alright, so we have a solid based on the client side with a couple of important screens. Let’s continue this build by implementing the backend side as well.
Backend
We will use Spotify API to get most of the data that we will need for the application.
When building data heavy applications, with a lot of relationships between models (ex: Albums, Artists, Playlists, Tracks, etc.) I prefer to work with a GraphQL API. This allows me to define the relationships between models once, on the backend, and then design my queries the way I need them on the frontend.
Spotify has a lot of widgets in the applications for recommendations, and all this widgets have very specific requirements of what data they need. So, instead of having to send multiple requests using a REST API, we will leverage the power of GraphQL to request specific data that we need for a specific widget.
The only thing is that Spotify’s API is a REST API. That’s not a problem, because we can easily add a GraphQL layer on top of it using StepZen.
Later in this module I will also show you how we can add custom functionalities, such as saving songs and creating playlists, by connecting StepZen directly to a PostgreSQL database.
On the client side we will use Apollo Client to query our GraphQL api and cache the data locally.
If it sounds confusing, follow on and you will see that with the right tools, it’s actually not that complicated.
This tutorial is sponsored by StepZen
StepZen is a GraphQL server with a unique architecture that helps you build APIs fast and with less code. All you have to do is write a few lines of declarative code and let StepZen do the hard work related to building scalable and performant GraphQL APIs.
Sign up for a free StepZen account: https://bit.ly/44G3EmT
Spotify API
Let’s use Spotify API to fetch information about tracks and artists.
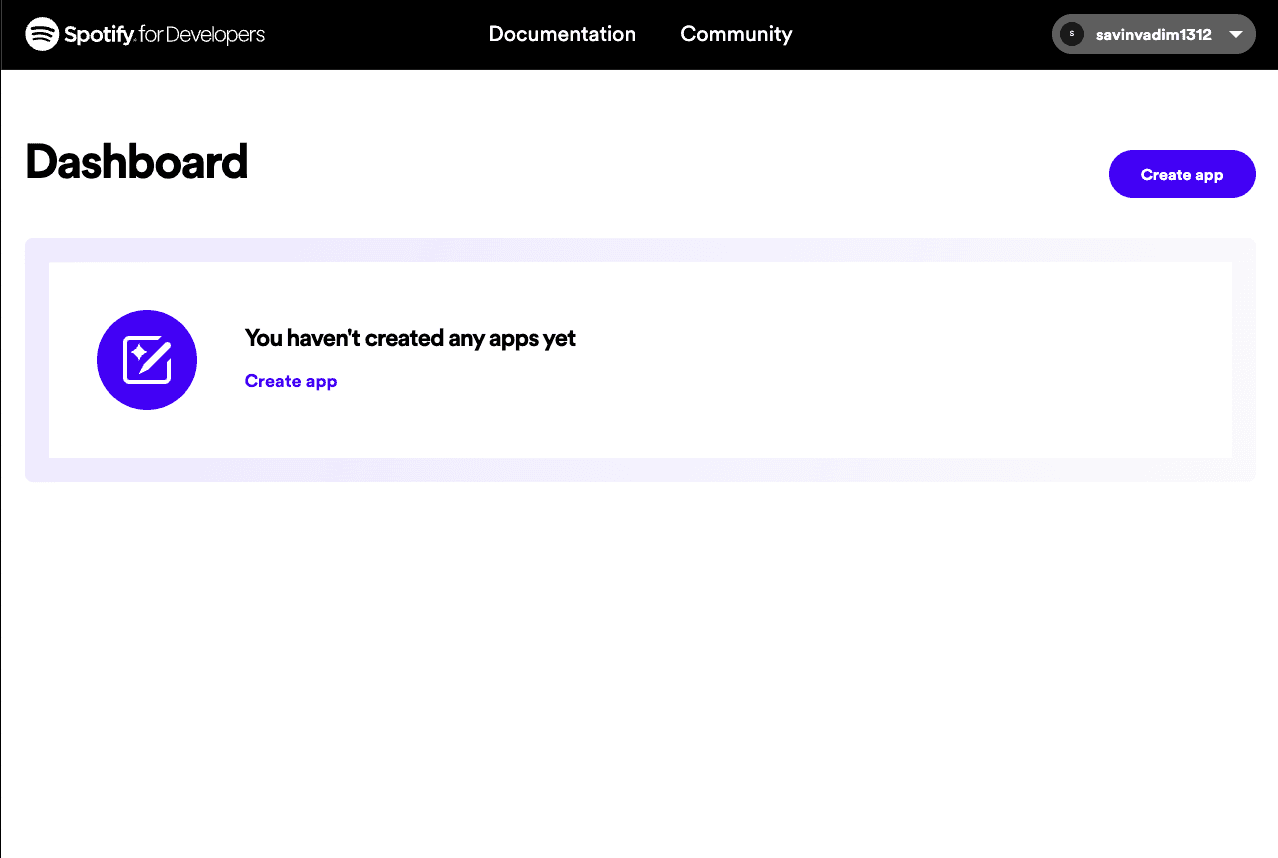
Login to Spotify Developer Dashboard with your Spotify account and let’s create our first app.
Request an access token
All the following API requests, should use an access token. We can generate one using our client id and secret. The newly generated token will be available for only 1 hour.
curl -X POST "https://accounts.spotify.com/api/token" \-H "Content-Type: application/x-www-form-urlencoded" \-d "grant_type=client_credentials&client_id=your-client-id&client_secret=your-client-secret"
Request artist data
curl "https://api.spotify.com/v1/artists/4Z8W4fKeB5YxbusRsdQVPb" \-H "Authorization: Bearer your-access-token"
💡 Access token auth mode only works for general queries like getting tracks, artists, etc. For user-specific queries like user’s playlists, we need to implement OAuth 2.0 Authorization
StepZen
Setup the StepZen CLI
- Let’s install Stepzen CLI using npm install -g stepzen.
- Sign up for a free StepZen account
- Login inside your terminal using stepzen login and provide the details from StepZen Dashboard
We are ready to create our GraphQL API.
Setup the StepZen project
Create a new folder inside our React Native project, and navigate there:
mkdir stepzen && cd stepzen
Fetch Track Recommendations
Based on the docs, we can get a list of recommendations using the following GET request.
curl "https://api.spotify.com/v1/recommendations?seed_genres=pop" \-H "Authorization: Bearer your-access-token"
Let’s use StepZen’s ✨import✨ to magically parse this request and generate our graphql schema:
stepzen import \curl "https://api.spotify.com/v1/recommendations?seed_genres=pop" \--header "Authorization: Bearer your-access-token" \--query-name "recommendations" \--query-type "Recommendation" \--name "recommendations" \--prefix "Recommend"
In a couple of seconds, we should have our GraphQL schema ready inside stepzen/recommendations/index.graphql. Open it and explore the queries and the types.
Deploy the GraphQL API
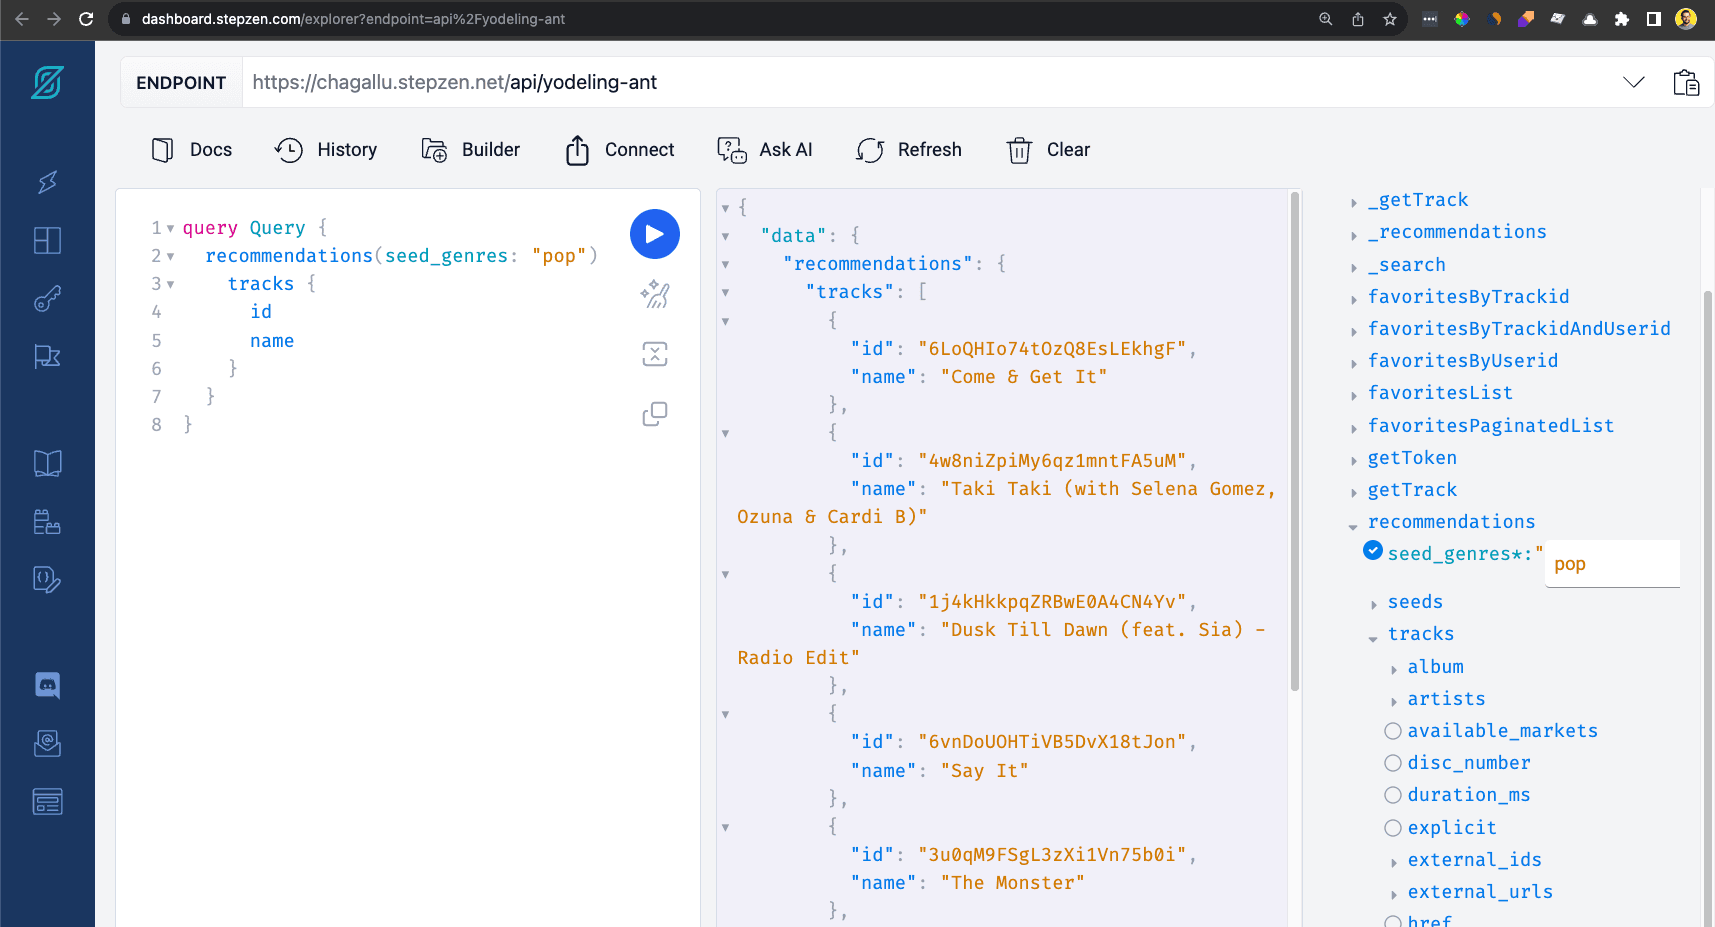
Deploying and running the API is as easy as it was creating it. Just run stepzen start and StepZen will deploy the API endpoint to their cloud and you will receive a link for the GraphQL explorer.
Open the explorer and run your first query.
Generate Token Query
stepzen import \curl -X POST "https://accounts.spotify.com/api/token" \--header "Content-Type: application/x-www-form-urlencoded" \--data "grant_type=client_credentials&client_id=your-client-id&client_secret=your-client-secret" \--query-name "getToken" \--query-type "TokenResponse" \--name "auth"
We have to make some small changes to take the client id and secret from the configuration file. After the changes, our auth/index.graphql should be:
type TokenResponse {access_token: Stringexpires_in: Inttoken_type: String}type Query {getToken: TokenResponse@rest(method: POSTendpoint: "https://accounts.spotify.com/api/token?grant_type=client_credentials&client_id=$client_id&client_secret=$client_secret"headers: [{ name: "content-type", value: "application/x-www-form-urlencoded" }]configuration: "auth_config")}
Now, create a file stepzen/config.yaml and setup tour client id and secret from Spotify Dashboard
configurationset:- configuration:name: auth_configclient_id: your_client_idclient_secret: your_client_secret
Authenticate before fetching other endpoints
Now, instead of us managing the access_token, we will setup a combined query based on 2 steps:
- Authenticate and get a fresh access token
- Use the access token to fetch other endpoints
To do that, we will create a new query and use the @sequence directive to execute getToken first, and then recommendations query second. Let’s update our stepzen/recommendations/index.graphql
...type Query {_recommendations(seed_genres: String, access_token: String!): Recommendation@rest(endpoint: "https://api.spotify.com/v1/recommendations"headers: [{ name: "authorization", value: "Bearer $access_token" }])recommendations(seed_genres: String!): Recommendation@sequence(steps: [{ query: "getToken" }{query: "_recommendations"arguments: [{ name: "seed_genres", argument: "seed_genres" }]}])}
Searching for Tracks
Based on Spotify docs, this GET request will help us search for tracks:
curl 'https://api.spotify.com/v1/search?q=nf&type=track' \--header 'Authorization: Bearer your-access-token'
Let’s import it in our StepZen project
stepzen import \curl 'https://api.spotify.com/v1/search?q=nf&type=track' \--header "Authorization: Bearer your-access-token" \--query-name "search" \--query-type "SearchResult" \--name "search" \--prefix "Search"
Then, update the query to add auth inside stepzen/search/index.graphql
...type Query {_search(q: String, access_token: String!): SearchResult@rest(endpoint: "https://api.spotify.com/v1/search?type=track"headers: [{ name: "authorization", value: "Bearer $access_token" }])search(q: String): SearchResult@sequence(steps: [{ query: "getToken" }{ query: "_search", arguments: [{ name: "q", argument: "q" }] }])}
Track Details
Here is the documentation to get the details of a track. Let’s try the following GET request:
curl 'https://api.spotify.com/v1/tracks/2LCGFBu1ej6zt4r1VGPjny' \--header 'Authorization: Bearer your-access-token'
Now we can import it in our StepZen project.
stepzen import \curl "https://api.spotify.com/v1/tracks/11dFghVXANMlKmJXsNCbNl" \--header "Authorization: Bearer your-access-token" \--path-params "/v1/tracks/\$trackId" \--query-name "getTrack" \--query-type "TrackResponse" \--name "track" \--prefix "Track"
Make sure to also add the authentication step, as we did for the other queries.
The GraphQL API is ready
And that’s it. We now have a working GraphQL API deployed. Let’s query it from our React Native app.
Setup Apollo Client
To query the GraphQL API we will use Apollo Client. Let’s install it first:
npx expo install @apollo/client graphql
Create a new Provider (src/providers/ApolloClientProvider.tsx) and set up the Apollo client to connect to our StepZen API.
import { ApolloClient, InMemoryCache, ApolloProvider } from '@apollo/client';import { PropsWithChildren } from 'react';const client = new ApolloClient({uri: 'https://<ACCOUNT_NAME>.stepzen.net/api/<ENDPOINT_NAME>/__graphql',headers: {Authorization:'apikey <YOUR_API_KEY>',},cache: new InMemoryCache(),});const ApolloClientProvider = ({ children }: PropsWithChildren) => {return <ApolloProvider client={client}>{children}</ApolloProvider>;};export default ApolloClientProvider;
Make sure to import it inside src/app/(tabs)/_layout.tsx and wrap our <Stack> Navigator inside it.
return (<ThemeProvider value={colorScheme === 'dark' ? DarkTheme : DefaultTheme}><ApolloClientProvider><PlayerProvider><Stack><Stack.Screen name="(tabs)" options={{ headerShown: false }} /><Stack.Screen name="modal" options={{ presentation: 'modal' }} /></Stack></PlayerProvider></ApolloClientProvider></ThemeProvider>);
Query the recommendations
Inside src/app/(tabs)/index.tsx, we will query the recommendation list from our API
...import { gql, useQuery } from '@apollo/client';const query = gql`query MyQuery($genres: String!) {recommendations(seed_genres: $genres) {tracks {idnamepreview_urlartists {idname}album {idnameimages {urlheightwidth}}}}}`;export default function HomeScreen() {const { data, loading, error } = useQuery(query, {variables: { genres: 'pop' },});if (loading) {return <ActivityIndicator />;}if (error) {return <Text>Failed to fetch recommendations. {error.message}</Text>;}const tracks = data?.recommendations?.tracks || [];return (<FlatListdata={tracks}renderItem={({ item }) => <TrackListItem track={item} />}/>);}
Now you should see a list of tracks coming directly from the API. You can change the genres strings to get recommendations from a different genre (see here available genres)
Now that you know how to set up queries and execute them, go ahead and implement the search query on the Search screen.
Saving favorite songs
In a lot of cases, when you integrate with a public API like Spotify, you most probably want to add some custom features to your app, not just fetch data from the API.
Let’s explore how this can be accomplished with our stack by implementing the possibility of saving favorite songs in a list. You can also extend this example and implement playlists.
First of all, we will need a database. Let’s use PostgreSQL, which is a powerful relational database.
There are multiple options to host a PostgreSQL database. You can run it locally on your machine, you can host it on a server or use a managed solution like AWS RDS, or you can use a service that can simplify the whole process.
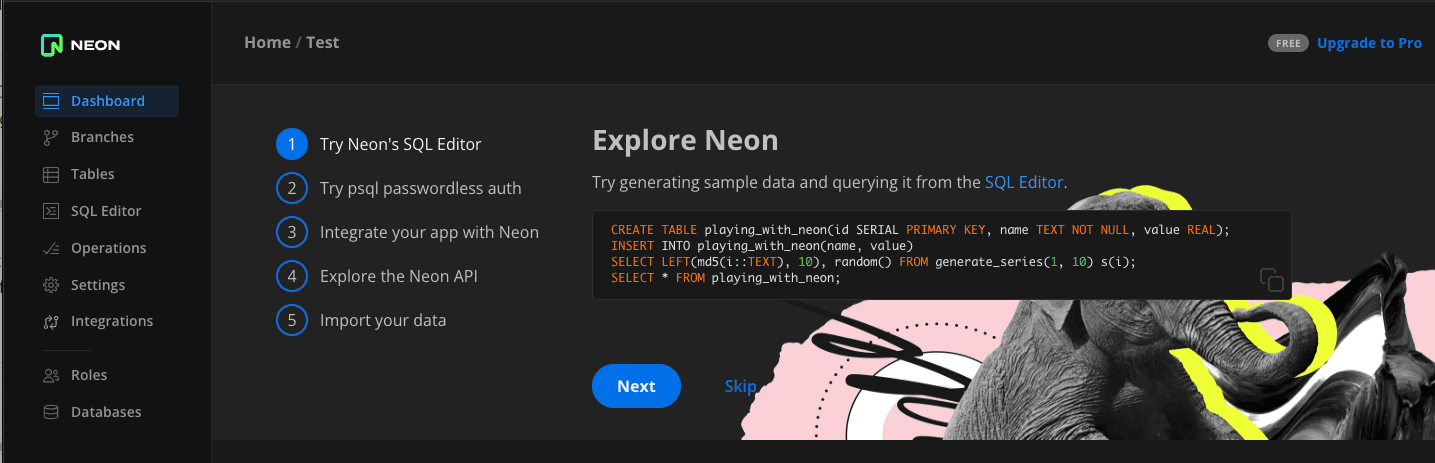
For this tutorial, we can use Neon.tech. I found it really easy and intuitive to set up and interact with your database, and they also offer a generous free tier.
Sign up and create a new project. Now we have a PostgreSQL database ready.
Create a new table
Our database is still empty. Let’s create a table that will keep the information about the favorite songs of users..
Open the SQL Editor page inside the Neon console, and paste the next SQL Query.
CREATE TABLE Favorites (id BIGINT GENERATED BY DEFAULT AS IDENTITY PRIMARY KEY,userid VARCHAR(255),trackid VARCHAR(255));
Connect StepZen to PostgreSQL
Let’s go back to our stepzen folder, open a terminal, and use the same magic import command.
stepzen import postgresql
It will ask the connection details that you can take from Neon dashboard. If you use correctly the credentials, you should see a new folder inside StepZen. It contains some pre-defined queries and mutations to add and remove favorite songs.
We can also add some custom mutations that will execute an SQL query. For example, if we want to delete a favorite song for a specific user, we will need the following mutation
deleteFavoriteTrackForUser(userId: String!, trackId: String!): Favorites@dbquery(type: "postgresql"schema: "public"query: """DELETE FROM "favorites" WHERE "userid" = $1 AND "trackid" = $2;"""configuration: "postgresql_config")
Connect data models using @materializer
The problem is that the favorite query only returns IDs. And if we want to render a list of favorite songs, we would have to run multiple queries from the front end to get the details of every song. But that’s the whole point we chose to use GraphQL. To avoid under-fetching.
We can use @materializer directive from StepZen to connect together models by linking them with different queries. For example, knowing the trackid from the Favorite type, we can run the getTrack query to also add the information about the Track.
type Favorites {id: ID!trackid: Stringuserid: Stringtrack: TrackResponse@materializer(query: "getTrack"arguments: [{ name: "trackId", field: "trackid" }])}
Now, we can query all the data with one single query.
Congrats 🎉
That was a long one but I am sure there was a lot to learn from building this Full Stack Spotify Clone.