
Introduction
SWR is a simple yet powerful data fetching and caching library developed by Vercel - the team behind NextJS.
In this tutorial, we will explore the power of SWR in a React Native (Expo) application. We will cover the fundamentals of SWR, how to get started with it and how to fetch data from both a REST API and a GraphQL API.
Create a new Expo project
Let’s start by creating a brand new Expo project.
npx create-expo-app@latest Swr
Open the new project in Visual Studio Code.
Before we run the project, let’s rename App.js to App.tsx to use Typescript.
To run the project, open a new terminal and run npm start.
Expo will detect that we have a typescript file, and will install and configure typescript for us. Just press enter.
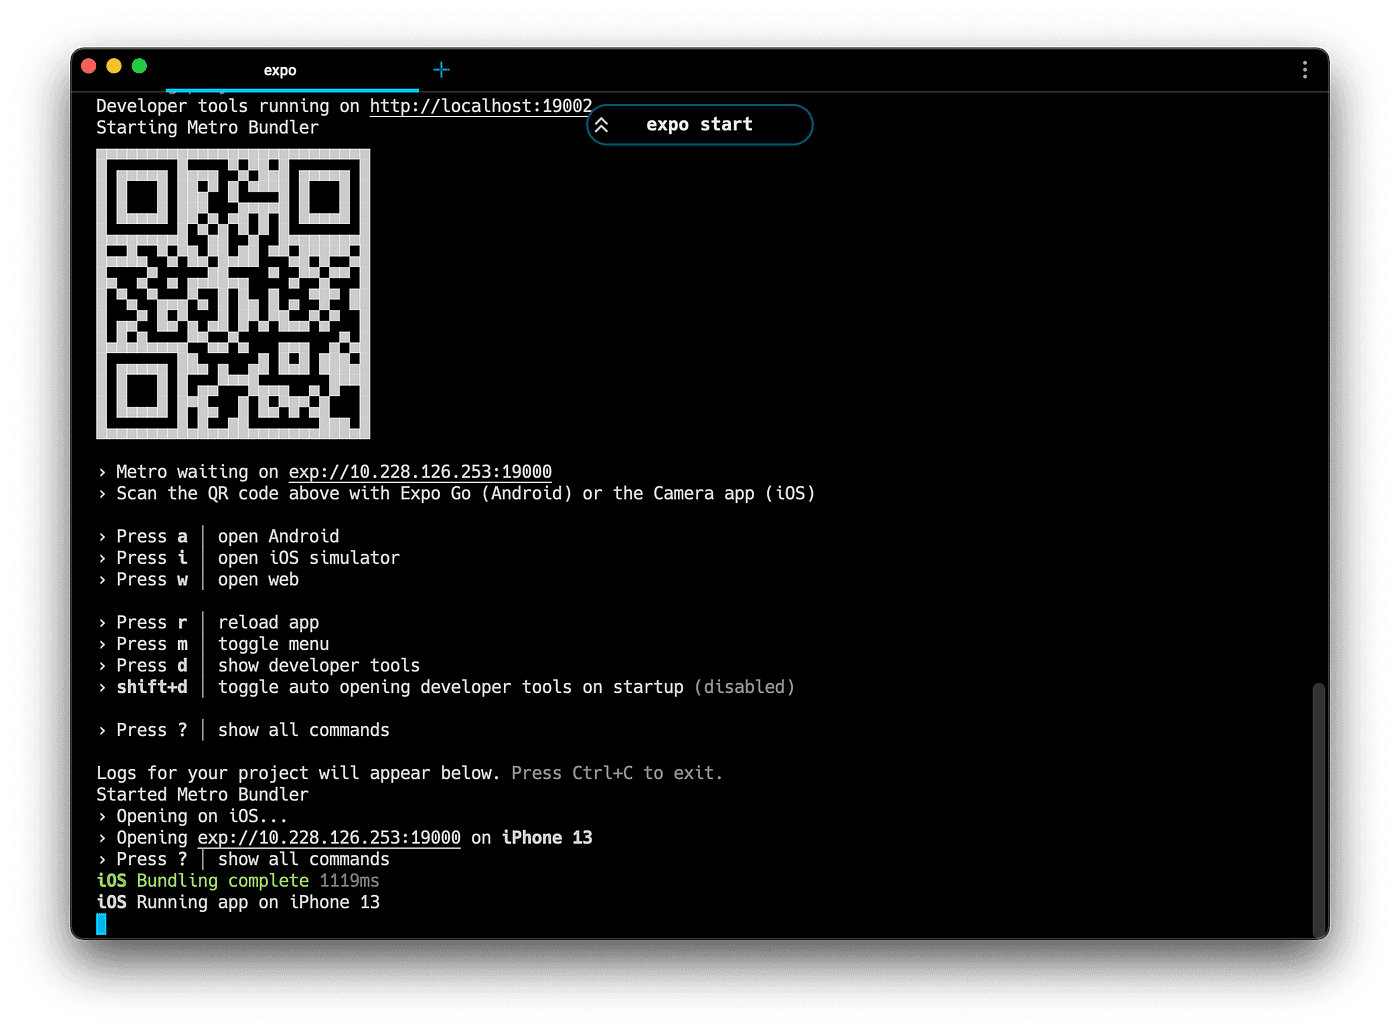
When the development server starts, we should see the expo development menu. From here, we can scan the QR using the Expo Go app with a physical device (Android or iOS). We can also run it on an iOS simulator by pressing "i", or on an Android emulator by pressing "a".
Get started with SWR
Install SWR
Let’s install the SWR library, by opening a new terminal, and running:
npm i swr
Fetch data
Let’s use SWR to fetch our first data. We will use the JSON Placeholder API and fetch a list of posts. Open App.tsx, and let’s implement the first request.
import useSWR from 'swr';const fetcher = (...args) => fetch(...args).then((res) => res.json());export default function App() {const { data, error, isLoading } = useSWR('https://jsonplaceholder.typicode.com/posts',fetcher);if (isLoading) {return <ActivityIndicator />}if (error) {return <Text>{error.message}</Text>}console.log(JSON.stringify(data, null, 2));return (...)}
With this in place, if we refresh our app, we will see a spinner for a split of a second, while the data is loading, and then it should switch to the default UI. Open up the expo terminal, and check the logs. We should see a list of posts that we received from the API console logged.
Render posts
Let’s build a new component inside src/components/PostListItem.tsx that will render one post
import { View, Text, StyleSheet } from 'react-native';const PostListItem = ({ post }) => {return (<View style={styles.container}><Text style={styles.title}>{post.title}</Text><Text style={styles.body}>{post.body}</Text></View>);};const styles = StyleSheet.create({container: {backgroundColor: '#fff',padding: 10,gap: 10,borderRadius: 10,},title: {fontWeight: 'bold',fontSize: 20,},body: {color: 'gray',},});export default PostListItem;
Now, let’s render the posts in a <FlatList /> inside App.tsx
<FlatListdata={data}contentContainerStyle={{ gap: 10, padding: 10 }}renderItem={({ item }) => <PostListItem post={item} />}/>
Let’s make data fetching reusable
Let’s first extract the fetcher function to separate file src/utils/fetcher.ts because we will use it in multiple files.
export const fetcher = (...args) => fetch(...args).then((res) => res.json());
Now, let’s create a custom hook usePosts inside src/hooks/posts.tsthat will fetch the posts and will return an object with 3 fields: posts, isLoading, and error.
import { fetcher } from '../utils/fetcher';import useSWR from 'swr';export function usePosts() {const { data, error, isLoading } = useSWR('https://jsonplaceholder.typicode.com/posts',fetcher);return {posts: data,isLoading,error,};}
Now, we can use this re-usable hook inside App.tsx
const { posts, error, isLoading } = usePosts();
Make sure to replace data={data} with data={posts} inside the FlatList.
Fetch user data for every post
Let’s start by creating a custom hook useUser inside src/hooks/users.ts . The hook will receive the user id and will return the user, isLoading, and error.
import { fetcher } from '../utils/fetcher';import useSWR from 'swr';export function useUser(id: number) {const { data, error, isLoading } = useSWR(`https://jsonplaceholder.typicode.com/users?id=${id}`,fetcher);return {user: data?.[0],isLoading,error,};}
Having this hook, we can fetch the user details inside the PostListItem.tsx component
const { user } = useUser(post.userId);
Render the user name, above the title of the post
<Text>{user?.name}</Text>
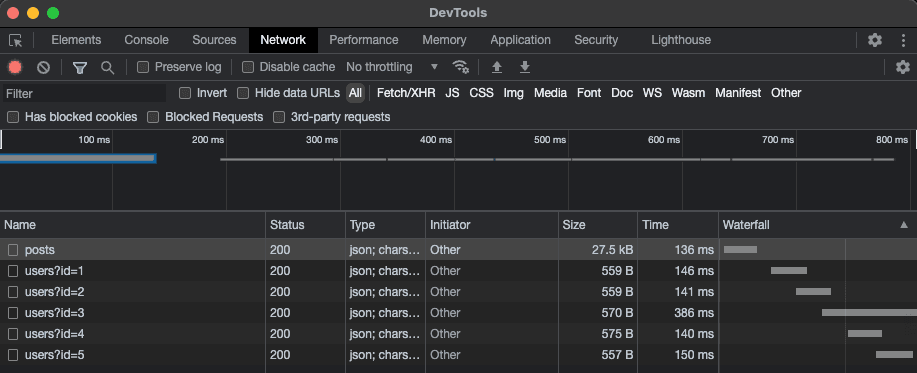
Now we can really see the power of SWR. Even though we have 100 posts in the list, and we are fetching the user data for every post, we would imagine that we have 100 requests to the API for user details. In fact, we only have 5 requests, because there are 5 unique users. That’s because SWR automatically deduped, cached and shared the data automatically.
To see that, open the debugger by pressing "J" in your expo terminal, go to the network tab and refresh the app.
Posts Screen
Before we move forward, let’s move the logic of the posts screen (fetching, and rendering the FlatList) to a separate file src/app/PostsScreen.tsx.
Import this component, and render it inside App.tsx
For more details, check out this commit.
SWR Global configuration
So far, we have used useSWR hook, without any global configurations. That’s great to get started quickly.
When want to provide global configurations, that will be reused throughout all SWR requests, we can do that using the <SWRConfig> component wrapped around our whole app.
One useful configuration we can setup at this moment, is the fetcher function. Let’s set it up inside App.tsx
import { SWRConfig } from 'swr';import { fetcher } from './src/utils/fetcher';export default function App() {return (<SWRConfig value={{ fetcher, dedupingInterval: 2000 }}>...</SWRConfig>)}
With this global config, we can remove the fetcher from individual useSWR hooks (hooks/posts.ts and hooks/users.ts), making them even cleaner:
const { data, isLoading, error } = useSWR('https://jsonplaceholder.typicode.com/posts',// fetcher - no longer needed. The global fetcher will be used);
Mutations & Revalidation
SWR provides the mutate and useSWRMutation APIs for mutating remote data and related cache. We are going to cover both scenarios
- Revalidating data from the cache (ex: we pull down the flat list, we want to revalidate the posts query)
- Mutating remote data: creating/updating a post on the server, and updating it in the cache
Prepare the UI
Let’s first create some buttons in our PostsScreen.tsx
const refresh = () => {// refresh posts}const onCreatePost = () => {// create a new post}return (<><Button title="Refresh" onPress={refresh} /><Button title="Create post" onPress={onCreatePost} /><FlatList.../></>);
Revalidate posts
To revalidate and refresh the posts, we should invalidate the query that fetched the posts. We do that, by running a mutation using the same key, as we used for fetching the posts. In the hooks/posts.tsx, the first argument of the useSWR hook serves both as the URL to be fetched, but more importantly, it serves as the key that SWR is using to cache the response.
const { data, isLoading, error } = useSWR('https://jsonplaceholder.typicode.com/posts',);
Now, we have to run a mutation, using the same key to revalidate the data and fetch it again from the server. There are 2 ways to do it: using the global mutate, and using a mutate returned by useSWR hook. Let’s see the difference.
Global mutate
The global mutate, allows us to invalidate cached data by providing a key.
import { useSWRConfig } from "swr"export default function PostsScreen() {const { mutate } = useSWRConfig()const refresh = () => {// refresh postsmutate('https://jsonplaceholder.typicode.com/posts');}}
If we only provide the key to the mutation, it will simply revalidate any active useSWR hook that is using the same key.
We can also provide new data and specify options when calling mutate:
mutate(key, data, options)
Bound mutate
The bound mutate is returned by the useSWR hook, and is basically a shorthand to the global mutate, that does not need a key. The key it uses is the same key as the useSWR request. This is handy to mutate data for an existing query.
To implement this, let’s first re-export the mutate field from our usePosts hook from hooks/posts.tsx
export function usePosts() {const { data, isLoading, error, mutate } = useSWR('https://jsonplaceholder.typicode.com/posts');return {posts: data,isLoading,error,mutate,};}
Now, we can access this bound mutate function from PostsScreen and we can call it without any argument, and it will revalidate the posts request
export default function PostsScreen() {const { posts, isLoading, error, mutate } = usePosts();const refresh = () => {// refresh postsmutate();}}
Mutating remote data
Let’s have a look at how we can mutate remote data to create a new post.
SWR provides useSWRMutation as a hook for remote mutations. The remote mutations are only triggered manually, instead of automatically like useSWR.
Let’s start by creating a function createPost that will send the post request to our API, and a custom hook useCreatePost that will serve as a shorthand for useSWRMutation. We will do this inside hooks/posts.ts
const createPost = async (url, newPost: NewPost) => {const response = await fetch(url, {method: 'POST',body: JSON.stringify(newPost),headers: {'Content-type': 'application/json; charset=UTF-8',},});return response.json();};export const useCreatePost = () => {const { trigger, data, isMutating, error } = useSWRMutation('https://jsonplaceholder.typicode.com/posts',createPost);return {trigger,newPost: data,isMutating,error,};};
Now we can use the custom hook useCreatePost inside the PostsScreen to define the mutation, and then trigger it when we press the Create Post button
export default function PostsScreen() {const { trigger, newPost } = useCreatePost();const onCreatePost = async () => {const newPost = {title: 'New Post',body: 'This is a new post created from the app',userId: 1,};try {await trigger(newPost);} catch (e) {Alert.alert('Failed to create the post');}};...}
With this in place, we can try to press the "Create post" button. We will see the new post for a split second, and then it will disappear. Why?
Well, that’s actually intended behaviour. First of all, the API we are using is not actually saving the post. It just simulated the request.
And, because both our fetch posts and create post SWR requests are using the exact same key https://jsonplaceholder.typicode.com/posts means that running the mutation, will also revalidate the posts, and fetch them again from the server. That’s why the post disappears.
We can also disable this behavior through the options when calling the trigger function. Simply set revalidate: false and the mutation will not revalidate the cache.
await trigger(newPost, { revalidate: false });
Optimistic updates
Another option we can provide to a mutation, is the optimisticData. Using it, we can make our UI feel really fast, by updating the local cache instantly, without waiting the request to be processed by the API.
await trigger(newPost, {revalidate: false,optimisticData: (current) => {return [newPost, ...current];},});
GraphQL Requests
SWR is backend agnostic. It means that it doesn’t matter if we are working with a REST API or a GraphQL API.
Let’s use IBM StepZen to set up a simple GraphQL API and fetch it inside our app.
Setup the GraphQL API
Install the StepZen cli:
npm install -g stepzen
Create a free StepZen account.
Now, let’s log in with StepZen cli by running stepzen login and providing your account name and Admin Key, which you can find on your StepZen Dashboard.
Now, let’s create a new folder stepzen inside our React Native project, and navigate to it
mkdir stepzen && cd stepzen
The next step is to convert the https://jsonplaceholder.typicode.com/posts endpoint to GraphQL by simply running:
stepzen import curl https://jsonplaceholder.typicode.com/posts
Now we can run stepzen start to deploy and run our new GraphQL API. After a couple of settings, you should see the URL in your terminal under "Explore it with GraphiQL at:". Click that URL, and it will open a graphical interface to test your new GraphQL endpoint.
Now, that our GraphQL API is ready, let’s see how we can fetch it with SWR
SWR with GraphQL
To send GraphQL requests, we can use the library graphql-request. Install it in our React native app by running the following command in the root directory of your project.
npm install graphql-request
Now, let’s create a new gqlFetcher function in utils/fetcher.ts that will help us send requests using this library
import { request } from 'graphql-request';export const gqlFetcher = (query) =>request({url: 'https://<YOUR_ACCOUNT_NAME>.stepzen.net/api/<YOUR_API_NAME>/__graphql',document: query,requestHeaders: {Authorization:'Apikey <YOUR_API_KEY>',},});
Make sure to replace <YOUR_ACCOUNT_NAME> , <YOUR_API_NAME> and <YOUR_API_KEY> with the values from your StepZen Dashboard.
Now, we can use this GraphQL fetcher in a new custom hook inside hooks/posts.ts
export function useGqlPosts() {const query = `query myQuery {myQuery {titlebodyuserId}}`;const { data, isLoading, error, mutate } = useSWR(query, gqlFetcher);return {posts: data?.myQuery,isLoading,error,mutate,};}
You can now replace usePosts with useGqlPosts hook inside the PostsScreen to use the new graphql request. To test if everything is working, you can go back to the query inside useGqlPosts and remove some fields. You should see this reflected in the UI.
That’s all it takes to fetch a GraphQL API using SWR.
SWR and React Native
SWR is designed to work out of the box in web environments. So far, everything worked fine, but there are some small but important things that are not working out of the box in React Native.
For example, SWR will not revalidate your queries when the app goes from background to active. It will not be revalidated when the phone connects to the internet.
To enable this features, we have to manually provide this functionality through the SWR Configuration.
Read more about this in the SWR React Native docs.
There is also a community library swr-react-native built by Fernando Rojo. It’s a simple drop-in replacement of SWR, customized for React Native.
Source code
If you encounter any issues, check out the full source code of this project.