
Introduction
In this project-based tutorial, you will learn the fundamentals of React Native by building the UI of one of the most iconic shopping app - Nike. The application has a minimalistic UI which makes this tutorial easy to follow even if you are just getting started with React Native.
We start slowly, however, by the end, we will get into more advance topics like Navigation and Global State management with Redux.
There is a lot to learn from this project, so let’s get started.
Watch the livestream:
Download the Asset bundle
Make sure to download the Asset bundle that I have prepared for you. It contains dummy data, pre-made component and will help you move along faster.
Create a brand new Expo app
Let’s start by initialising a new Expo project by running:
npx create-expo-app NikeApp
After that’s done, open the application folder with your editor of choice.
To run the application, we have to open a new terminal and navigate to the application directory. If you are using the terminal from VScode, the terminal automatically opens in the current directory.
Now, let’s start the development server by running
npm start
We should see the expo dev server. From there, we can either scan the QR code with our physical device using the Expo Go app, or we can run the application on an iOS simulator by pressing i or android emulator by pressing a.
Homepage UI: a list of products
Let’s start building our application from the main page - the homepage. This screen will render a list of items.
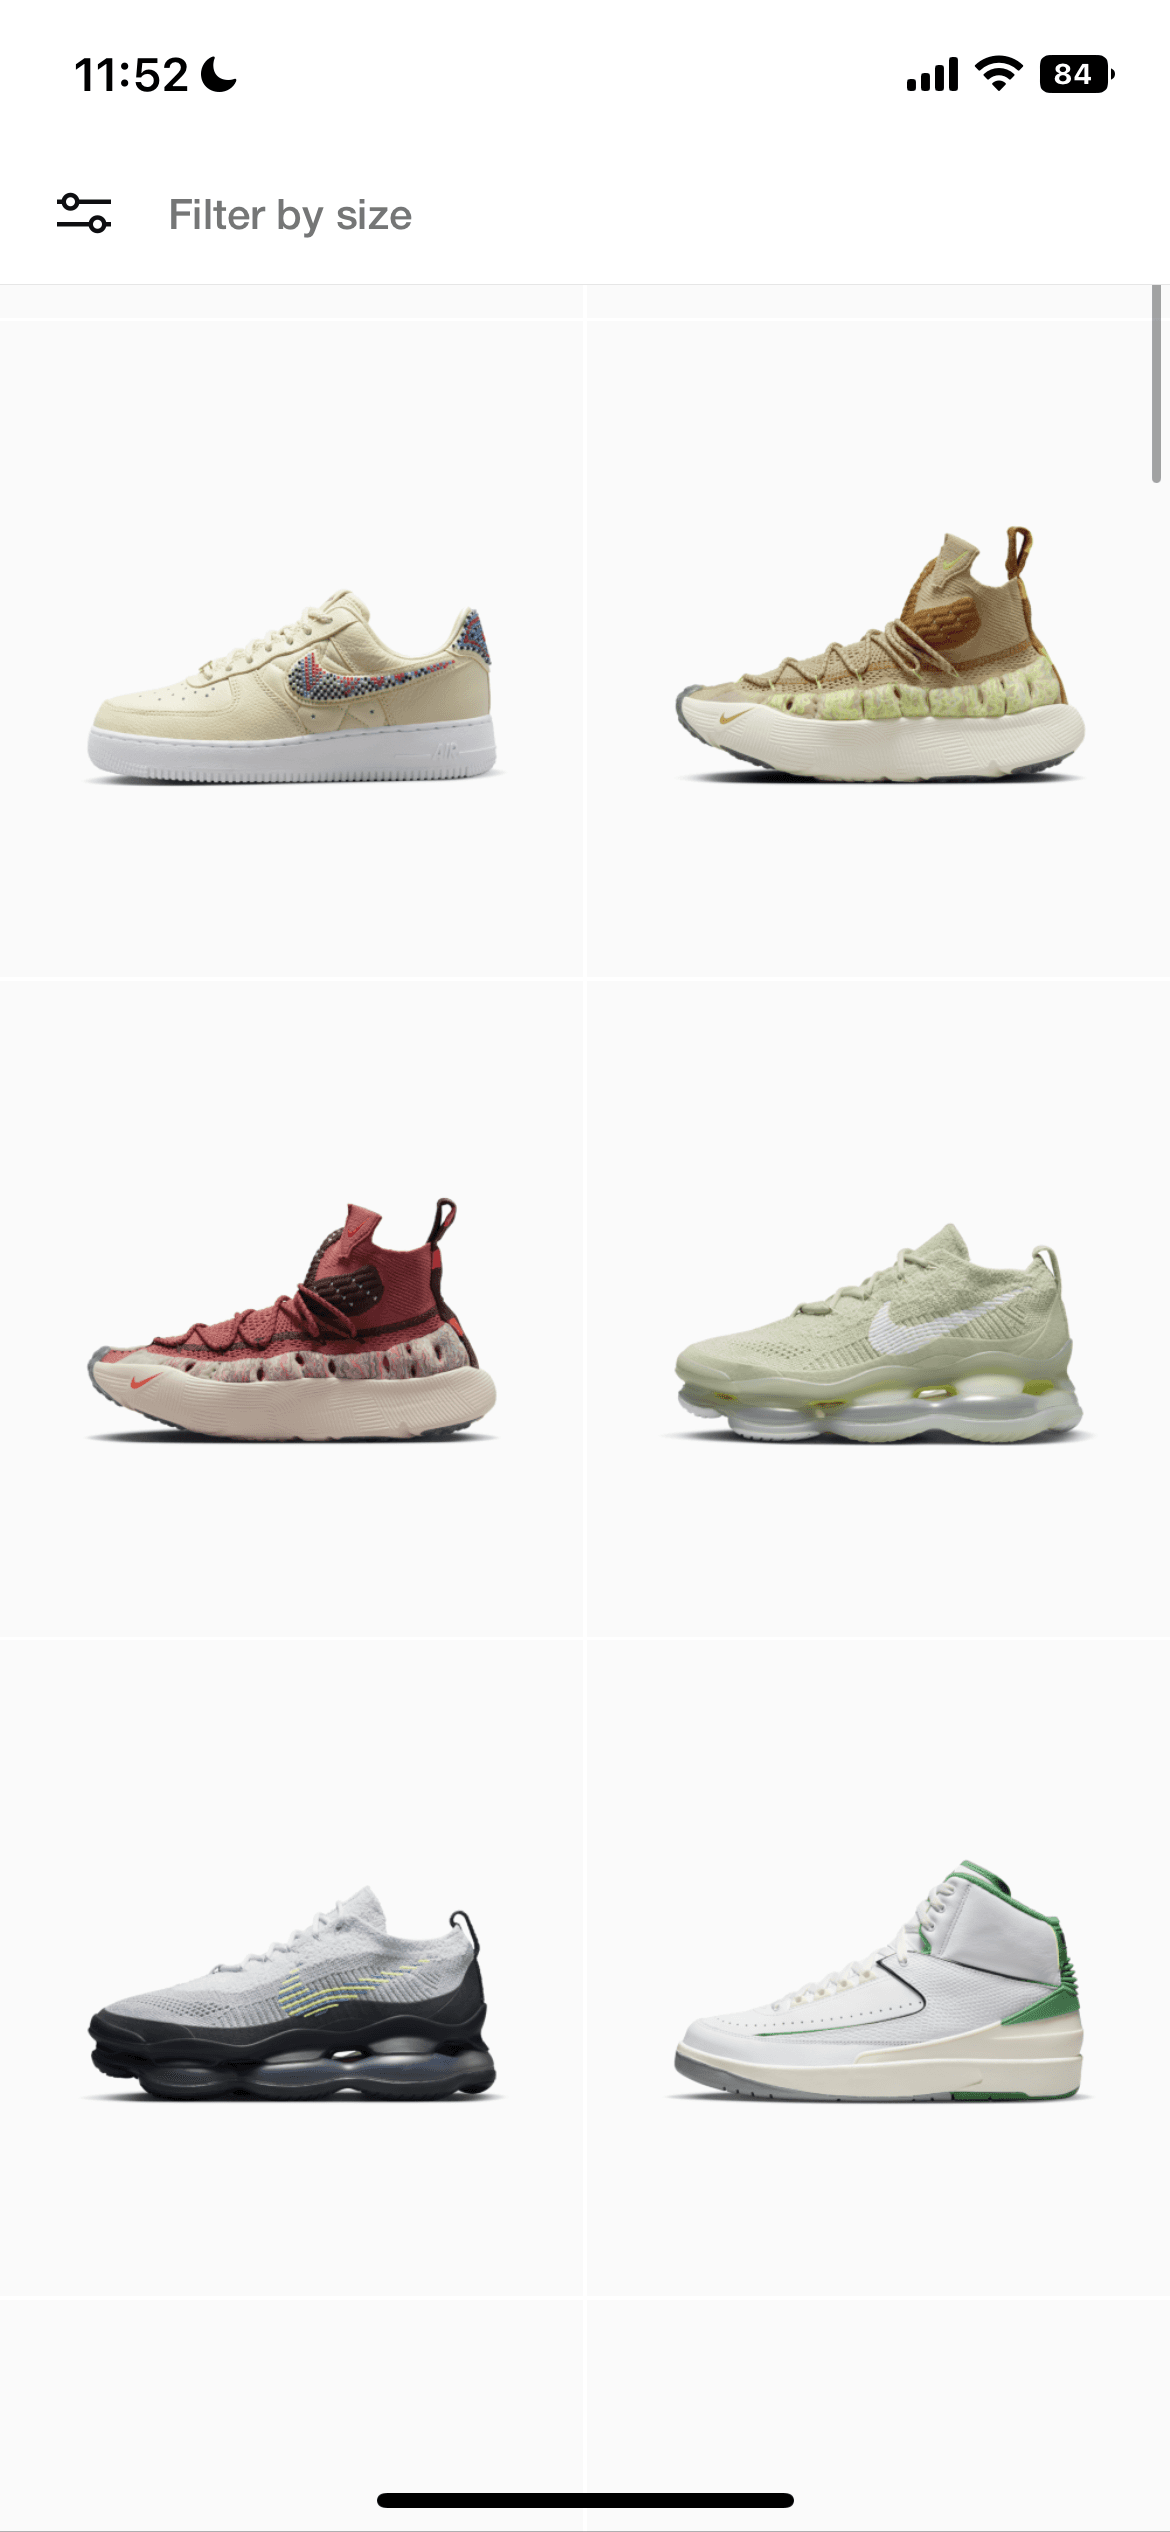
I love the simplicity of Nike’s UI, and you might want to jump ahead to implement the whole 2-column grid layout of items. However, I like to break-down the UI into smaller, independent components.
The Product list item
The smallest and independent component on the home page, is one product item. Let’s start with this one.
What is it made of? Well, it’s just an image.
Let’s render an Image component with full width and an aspect ration of 1 to make the image square
<Imagesource={{uri: "https://notjustdev-dummy.s3.us-east-2.amazonaws.com/nike/nike1.png",}}style={{width: "100%", aspectRatio: 1}}/>
The list of items
Let’s use a FlatList from react-native to render a list of products.
<FlatListdata={products}renderItem={({ item }) => (<View style={{ width: "50%", padding: 1 }}><Image source={{ uri: item.image }} style={styles.image} /></View>)}numColumns={2}/>
⚠️ The products array was imported from the dummy data:
import products from './src/data/products';
Once this is done, we can extract this flatList to a separate component ProductsScreen. This will help us easier render different screens in the next steps.
For that, create a src/screens folder and a new file ProductsScreen.js
Product Details Screen UI
Let’s move on to the Product Details screen. This page contains a bit more content.
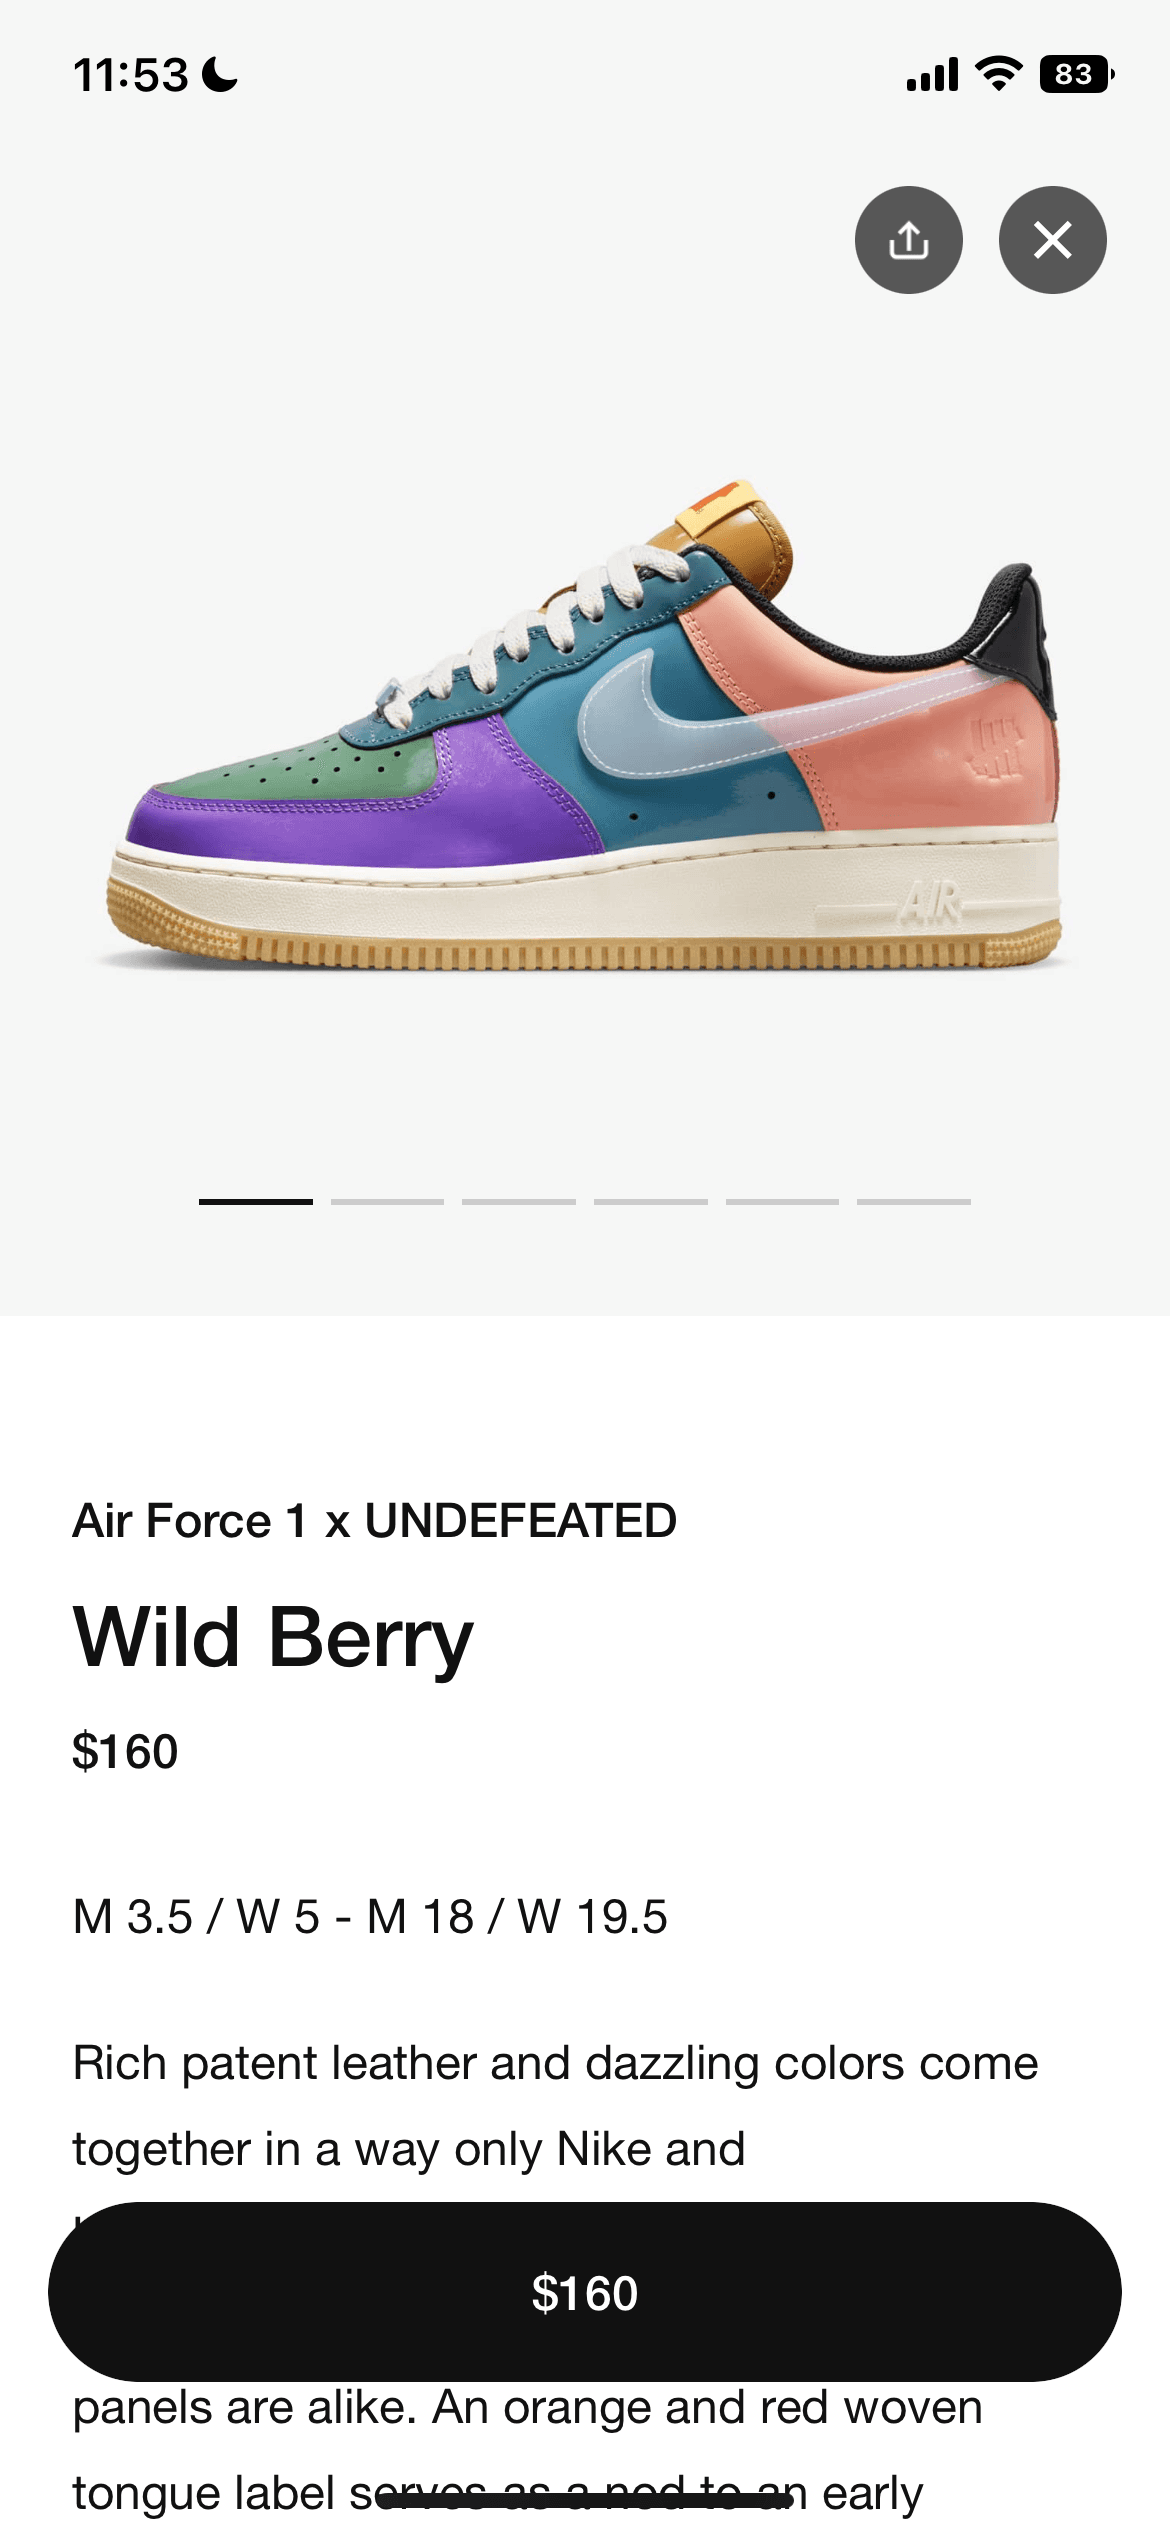
At the top, we have to render a Carousel of images. Then we will display the name of the product, it’s price and then the description.
Lastly, we will add a "Add to cart" button that will always be visible on the screen, and some icons on the top to close the page.
Let’s start with a blank component ProductDetailsScreen
import { StyleSheet, View } from "react-native";import products from "../data/products";const ProductDetailsScreen = () => {const product = products[0];return (<View>{/* Image Carousel */}{/* Title */}{/* Price */}{/* Description */}{/* Add to cart button */}{/* Navigation icon */}</View>);};const styles = StyleSheet.create({});export default ProductDetailsScreen;
Image Carousel
Let’s start with the things that we already know: rendering one image:
<Imagesource={{ uri: product.images[0] }}style={{ width: '100%', aspectRatio: 1 }}/>
To make this into a Carousel, we will leverage the power of a FlatList and will send 2 extra properties to make it work like carousel:
- horizontal will display the items horizontally
- pagingEnabled will make scrolling through images feel like a carousel.
{/* Image Carousel */}<FlatListdata={product.images}renderItem={({ item }) => (<Image source={{ uri: item }} style={{ width, aspectRatio: 1 }} />)}horizontalshowsHorizontalScrollIndicator={false}pagingEnabled/>
💡 Making the flatList horizontal, breaks our width: 100% style of the image, because the parent container now becomes infinitly long.
We can take the width of the phone screen using const { width } = useWindowDimensions(); and use it to make the image full-width.
Texts
Let’s move on to the text content for the name, price and description.
<View style={{ padding: 20 }}>{/* Title */}<Text style={styles.title}>{product.name}</Text>{/* Price */}<Text style={styles.price}>${product.price}</Text>{/* Description */}<Text style={styles.description}>{product.description}</Text></View>
Here are the styles we will apply to them
title: {fontSize: 34,fontWeight: "500",marginVertical: 10,},price: {fontWeight: "500",fontSize: 16,},description: {marginVertical: 10,fontSize: 18,lineHeight: 30,fontWeight: "300",},
💡 When the description is too long it goes off the screen.
To allow users to see the full description by scrolling down, we have to encapsulate our components inside a <ScrollView></ScrollView>
Button
For the button, we will use the Pressable component which gives us the possibility to handle user events such as onPress.
{/* Add to cart button */}<Pressable style={styles.button} onPress={addToCart}><Text style={styles.buttonText}>Add to cart</Text></Pressable>button: {backgroundColor: 'black',position: 'absolute',bottom: 30,width: '90%',alignSelf: 'center',alignItems: 'center',padding: 20,borderRadius: 100,},buttonText: {color: 'white',fontWeight: '500',fontSize: 16,},
Icon Button
Chose an icon from https://icons.expo.fyi/ and then import it at the top of your component
import { Ionicons } from "@expo/vector-icons";
Now, let’s render the icon inside a Pressable component to be able to style it as circle.
{/* Navigation icon */}<Pressable style={styles.icon}><Ionicons name="close" size={24} color="white" /></Pressable>icon: {position: "absolute",top: 50,right: 20,backgroundColor: "#000000AA",borderRadius: 50,padding: 5,},
Shopping Cart UI
Let’s import the pre-made component that will display a cart item. Drag it from the asset bundle inside the src/components folder of your project.
Now, let’s create the srceens/ShoppingCart.js and render a list of CartListItems
import { FlatList, StyleSheet } from 'react-native';import cart from '../data/cart';import CartListItem from '../components/CartListItem';const ShoppingCart = () => {return (<FlatListdata={cart}renderItem={({ item }) => <CartListItem cartItem={item} />}/>);};
At the bottom of the list, we want to render the totals. Let’s render this information as the ListFooterComponent of the FlatList
<FlatListdata={cart}renderItem={({ item }) => <CartListItem cartItem={item} />}ListFooterComponent={() => (<View style={styles.totalsContainer}><View style={styles.row}><Text style={styles.text}>Subtotal</Text><Text style={styles.text}>410,00 US$</Text></View><View style={styles.row}><Text style={styles.text}>Delivery</Text><Text style={styles.text}>16,50 US$</Text></View><View style={styles.row}><Text style={styles.textBold}>Total</Text><Text style={styles.textBold}>426,50 US$</Text></View></View>)}/>
Here are the styles for these texts
const styles = StyleSheet.create({totalsContainer: {margin: 20,paddingTop: 10,borderColor: "gainsboro",borderTopWidth: 1,},row: {flexDirection: "row",justifyContent: "space-between",marginVertical: 2,},text: {fontSize: 16,color: "gray",},textBold: {fontSize: 16,fontWeight: "500",},});
Finally, we have to render the Checkout button that will be always visible on the screen.
<View style={styles.footer}><Pressable style={styles.button}><Text style={styles.buttonText}>Checkout</Text></Pressable></View>footer: {position: "absolute",bottom: 0,width: "100%",backgroundColor: "white",borderColor: "gainsboro",borderTopWidth: 1,padding: 20,},button: {width: "100%",backgroundColor: "black",alignSelf: "center",alignItems: "center",padding: 20,borderRadius: 100,},buttonText: {color: "white",fontWeight: "500",fontSize: 16,},
Navigation
So far we have created 3 screens in our application, but there is still no way we can navigate between them.
Let’s go ahead and use React Navigation library to setup our screens and to navigate between them.
Start by installing the necessary libraries:
npx expo install @react-navigation/native @react-navigation/native-stack react-native-screens react-native-safe-area-context
Create the navigation.js file and render the NavigationContainer inside it.
Stack Navigator
We will use a Native Stack Navigator to manage the navigation between our screens.
import { createNativeStackNavigator } from '@react-navigation/native-stack';const Stack = createNativeStackNavigator();const Navigation = () => {return (<NavigationContainer><Stack.Navigator><Stack.Screen name="Products" component={ProductsScreen} /><Stack.Screen name="Product Details" component={ProductDetailsScreen} /><Stack.Screen name="Cart" component={ShoppingCart} /></Stack.Navigator></NavigationContainer>);};
Now we lets navigate to Product Details screen when we press on one item on the Products screen.
const ProductsScreen = ({ navigation }) => {...<PressableonPress={() => {navigation.navigate('Product Details');}}>...</Pressable>
We can make the Product details screen display as a modal, by specifying the presentation mode for the Stack.Screen options:
<Stack.Screenname="Product Details"component={ProductDetailsScreen}options={{ presentation: 'modal' }}/>
Add a header button that will navigate to the Cart page.
options={({ navigation }) => ({headerRight: () => (<PressableonPress={() => navigation.navigate('Cart')}style={{ flexDirection: 'row' }}><FontAwesome5 name="shopping-cart" size={18} color="gray" /><Text style={styles.cartItems}>1</Text></Pressable>),})}
Attach the container style to style all the screens
<Stack.Navigator screenOptions={{ contentStyle: styles.container }}>
Global state management with Redux
Now that we are done with the User Interface, let’s start designing the data flow of our application. Where will we store the data, how can we share it between different components, and how will we update it?
Because we split our application into multiple smaller components, which is required if you want your application to scale easily, now we have multiple components dependent on the same data.
To explain this, we will use the cart example:
- from the product details screen, we want to add products to the cart
- from the ShoppingCart screen, we want to render the products that are in the cart
- from the CartListItem.js we want to update the quantity of one cart item
As we can see, the same data about the shopping cart is needed in a lot of places.
That’s why we need to handle this data using a global state management library.
In this tutorial, we will use Redux and Redux Toolkit to handle our global state.
Setup Redux using Redux Toolkit
Let’s get started by installing the libraries
npm install @reduxjs/toolkit react-redux
After this, let’s configure our store inside src/store/index.js
import { configureStore } from '@reduxjs/toolkit';export const store = configureStore({reducer: {},});
To have access to our store from the components, we have to wrap our application inside a Provider
import { Provider } from 'react-redux'...<Provider store={store}></Provider>
Products state (slice)
A slice is a logical group of data. One group of data that we will manage globally, are the products. Let’s create a slice for them inside src/store/productsSlice.js
import { createSlice } from '@reduxjs/toolkit';import products from '../data/products';const initialState = {products: products,selectedProduct: null,};export const productsSlice = createSlice({name: 'products',initialState,reducers: {setSelectedProduct: (state, action) => {state.selectedProduct = state.products.find((p) => p.id === action.payload);},},});
Let’s connect our slice to our main store inside src/store/index.js
import { configureStore } from '@reduxjs/toolkit';import { productsSlice } from './productsSlice';export const store = configureStore({reducer: {products: productsSlice.reducer,},});
And now, we can go ahead and use the products from our global state inside ProductsScreen.js
import { useDispatch, useSelector } from 'react-redux';const ProductsScreen = ({ navigation }) => {const products = useSelector((state) => state.products.products);...}
To update our global state and set a new selectedProduct, let’s import the dispatch method, and the products slice with its actions. We will dispatch the setSelectedProduct action before moving the the Product Details screen.
import { useDispatch, useSelector } from 'react-redux';...const dispatch = useDispatch();...dispatch(productsSlice.actions.setSelectedProduct(item.id));
Now go ahead, and display the selected product from the global state inside the ProductDetailsScreen.js .
const product = useSelector((state) => state.products.selectedProduct);
Shopping cart state
Let’s start with defining our cartSlice.js and connect it to the main store.
import { createSlice } from '@reduxjs/toolkit';const initialState = {items: [],deliveryPrice: 15,freeDeliveryFrom: 200,};export const cartSlice = createSlice({name: 'cart',initialState,reducers: {addCartItem: (state, action) => {},changeQuantity: (state, action) => {},},});
Let’s implement the logic of our addCartItem reducer, that will simply push a new product in the state
addCartItem: (state, action) => {const newProduct = action.payload.product;state.items.push({ product: newProduct, quantity: 1 });},
Dispatch the action that will trigger this reducer inside ProductDetailsScreen when the users clicks on the Add to cart button
const dispatch = useDispatch();const addToCart = () => {dispatch(cartSlice.actions.addCartItem({product}))}
After we add items to the cart, we can get them inside ShoppingCart.js to display them on the screen
const cartItems = useSelector((state) => state.cart.items);
Custom selectors
Let’s create and export a selector that will return the number of cart items and then use it inside the navigation button near the cart icon:
export const selectNumberOfItems = (state) => state.cart.items.length;
Now, let’s also add custom selectors for our subtotals. This selectors will contain a bit more logic.
export const selectSubtotal = (state) =>state.cart.items.reduce((sum, item) => sum + item.product.price * item.quantity,0);export const selectSelf = (state) => state.cart;export const selectDeliveryPrice = createSelector(selectSelf,selectSubtotal,(state, subtotal) =>subtotal > state.freeDeliveryFrom ? 0 : state.deliveryPrice);export const selectTotal = createSelector(selectSubtotal,selectDeliveryPrice,(subtotal, delivery) => subtotal + delivery);