Introduction
It's very rare to find a react native app without a global state management library. It's also very common to find a react native app with redux. Redux is one of the most used state management libraries in React / React Native and a tool that is being asked as a job requirement.
If you wanted an easy explanation of what redux is, you are in luck! In this article, we will dive into the world of redux and learn how to get started with redux in react native.
Understanding Redux
Before we go into the implementation of redux in react native, let's first understand what redux is. Redux is a state management library that helps you manage the state of your react native app. It is a predictable state container for JavaScript apps. It helps you write applications that behave consistently, run in different environments (client, server, and native), and are easy to test.
Chances are you have come across a lot of negative comments on Redux. But thanks to the awesome maintainers of Redux, they have made it easier and simpler to use Redux. They came up with Redux-Toolkit aka Modern Redux which is a package that helps you write Redux logic in a very simple manner. It is intended to be the standard way to write Redux logic. It was originally created to help address three common concerns about Redux:
- "Configuring a Redux store is too complicated"
- "I have to add a lot of packages to get Redux to do anything useful"
- "Redux requires too much boilerplate code"
In this blog post, we will be using Redux-Toolkit to get started with Redux in React Native. Let's get started!
High Level Architecture of Redux
Before we describe the terms and concepts of Redux, let's first see the high level architecture of Redux. This will give you a better understanding of how Redux works.
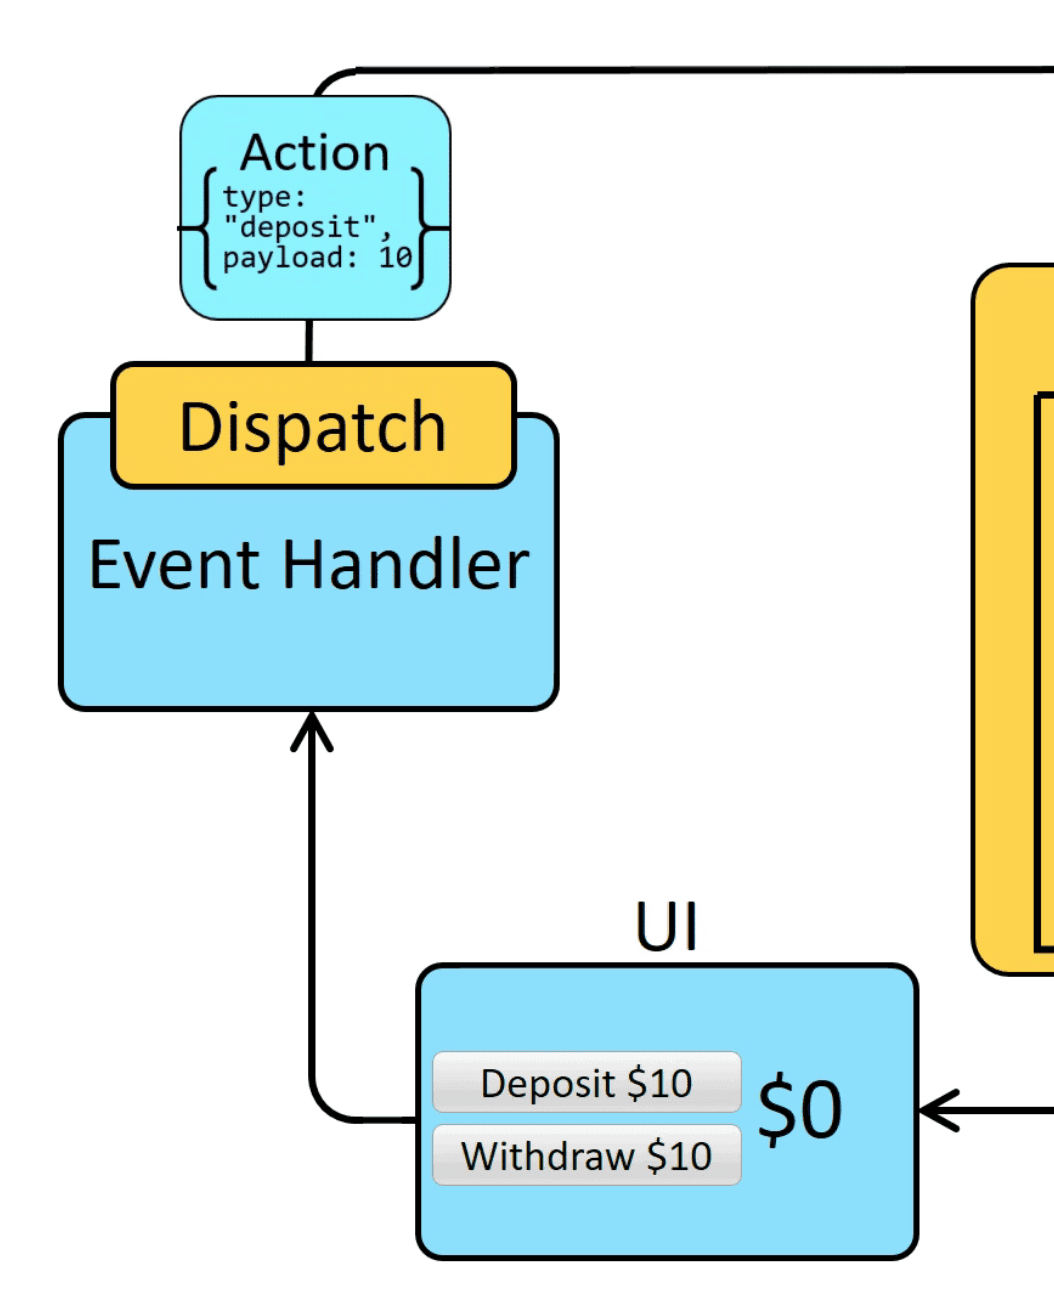
Imagine that you have an app, the app has two buttons. Deposit and Withdraw. When you click on the Deposit button, the amount is added to the balance. When you click on the Withdraw button, the amount is subtracted from the balance. You want your balance to be available through the whole app. You want to be able to access the balance from any components/screens in the app. Basically, you want to have a global state that is available throughout the app. This is where Redux comes in.

Image Credits - Redux documentation
The diagram has mainly three parts.
- The first part is the Store. The store is the global state of the app. It is the single source of truth.
- The second part is the Actions. Actions are the things that happen in the app.
- The third part is the Reducers. Reducers are the functions that take the current state and an action as arguments, and return a new state result.
Actions
Now if you look at the diagram again, you will see that at the bottom there is the UI part which has the buttons. This is typically the React Native part of the app. When the users click on the buttons, something gets triggered. Depending on which button is clicked, the trigger will be different. This is what we call an Action. An action is a plain JavaScript object that has a type property. The type property describes the type of action that happened. For example, if the user clicks on the Deposit button, the action will be something like this:
{type: 'deposit',payload: 10}
The type property is a string that describes the type of action that happened. In this case, the type is deposit. The payload property is the amount that the user wants to deposit. In this case, the payload is 10.
Similarly, if the user clicks on the Withdraw button, the action will be something like this:
{type: 'withdraw',payload: 10}
Reducers
Now that we have the actions, we need to have a way to handle these actions. This is where the reducers come in. Reducers are the functions that take the current state and an action as arguments, and return a new state result. The reducer is a pure function that takes the previous state and an action, and returns the next state. (previousState, action) => newState
Let's see how the reducer will look like for the deposit action. The reducer will take the current state and the action as arguments. The current state will be the current balance. The action will be the deposit action. The reducer will return the new balance. The new balance will be the current balance plus the amount that the user wants to deposit.
const reducer = (state, action) => {switch (action.type) {case 'deposit':return state + action.payload;case 'withdraw':return state - action.payload;default:return state;}};
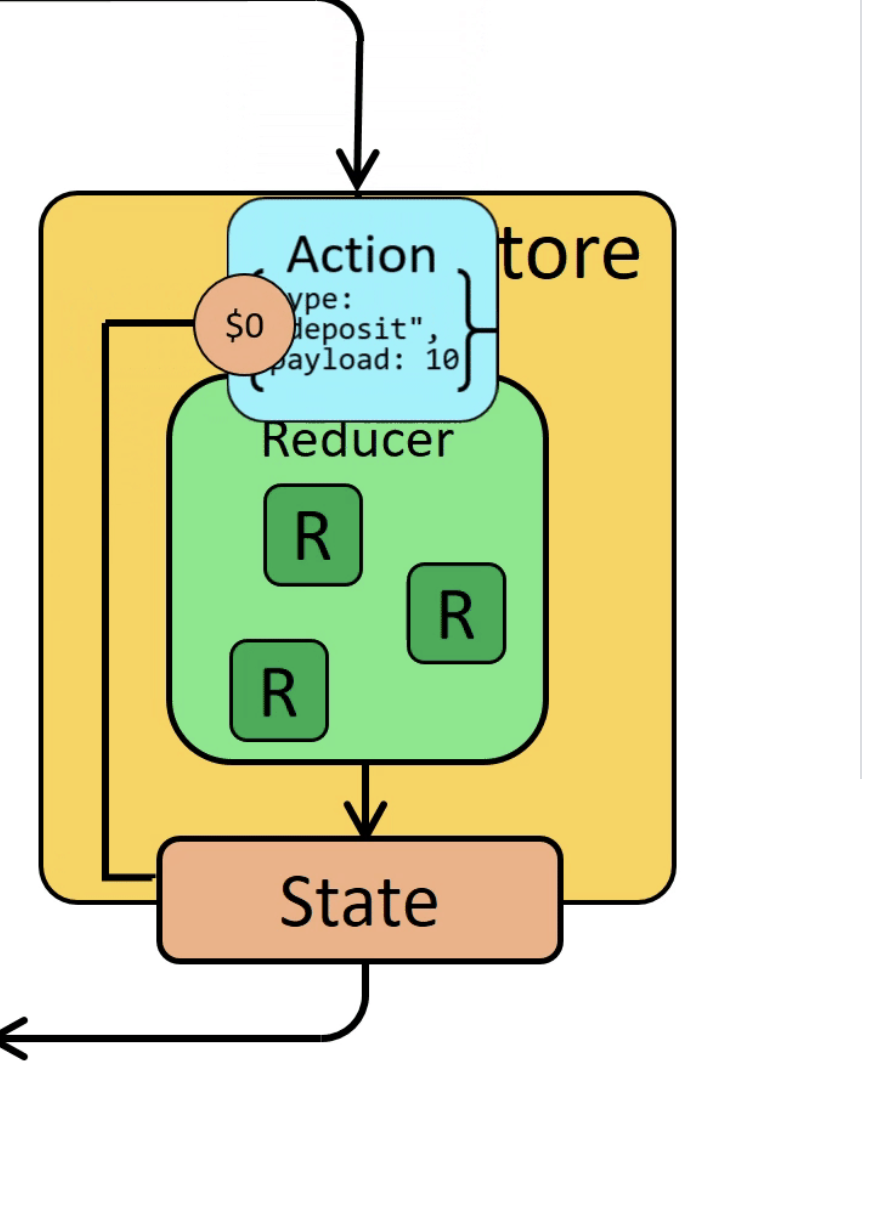
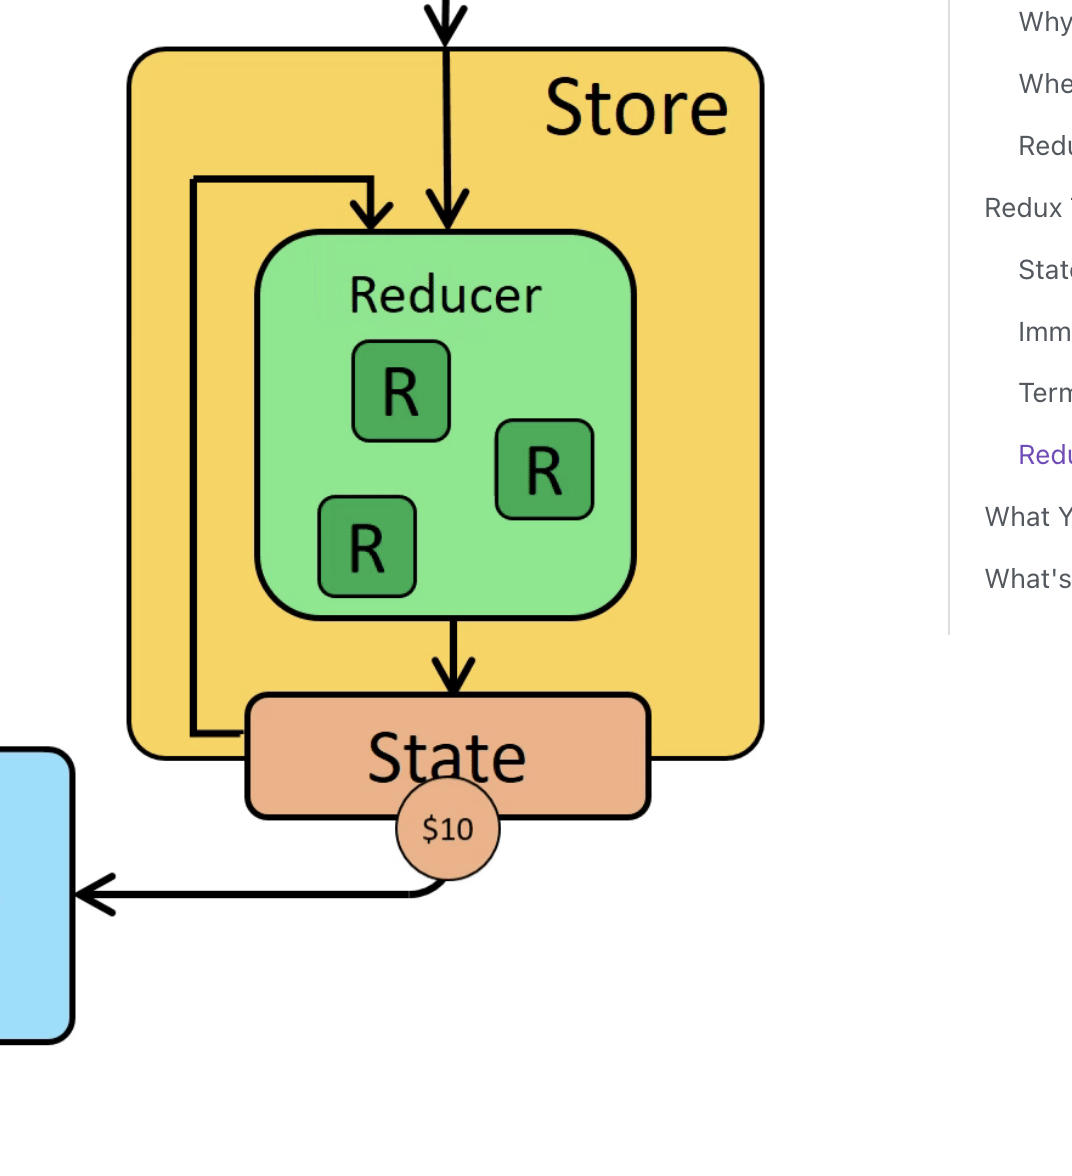
Store
Now that we have the actions and the reducers, we need to have a way to store the state. This is where the store comes in. The store is the global state of the app. It is the single source of truth. The store can have multiple reducer functions.
Getting Started with Redux in React Native
Now that we have a basic understanding of what Redux is, let's get started with Redux in React Native. We will be using Redux-Toolkit to get started with Redux in React Native. Let's get started!
Create a new React Native App
First, let's create a new React Native app. We will be using expo to create a new React Native app. If you don't have expo installed, you can install it by running the following command:
npm install -g expo-cli
Now let's create a new React Native app. Run the following command:
expo init redux-demo
When it asks for the template, select tabs (TypeScript). We have selected the tabs (TypeScript) template because it comes with a tab navigation and we get multiple screens to work with.
This will create a new React Native app called redux-demo. Now let's go into the redux-demo directory and run the following command:
cd redux-demonpm start
This will start the metro bundler. Now you can open the app in the iOS simulator or Android emulator. If you want to run the app on your device, you can download the expo app from the app store or play store and scan the QR code.
Install Redux Toolkit
Now that we have a new React Native app, lets install Redux toolkit. Run the following command:
npm install @reduxjs/toolkit react-redux
With that set up, you should be able to see the following preview in your app.
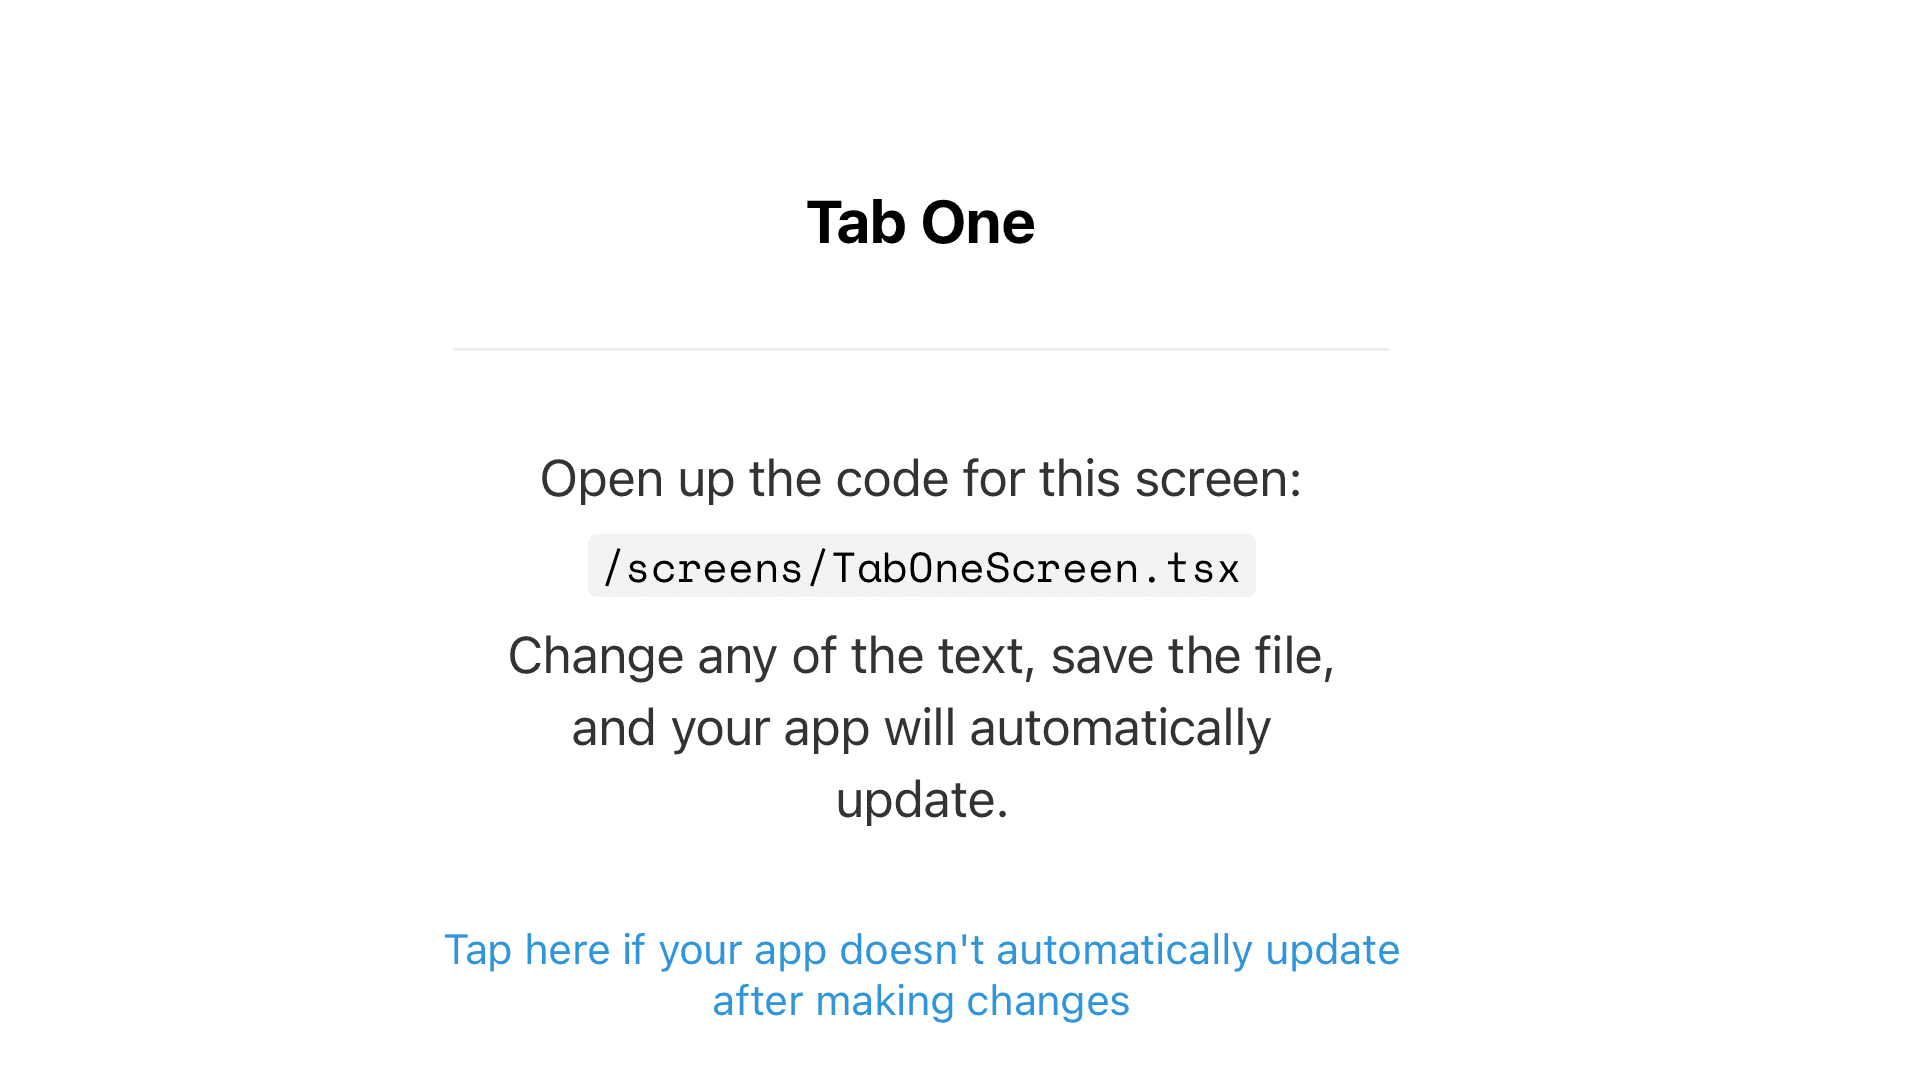
Create the UI
Let's open up the TabOneScreen component. We will be adding the UI for the Redux demo app in this component. Let's remove everything from the TabOneScreen component and add the following code:
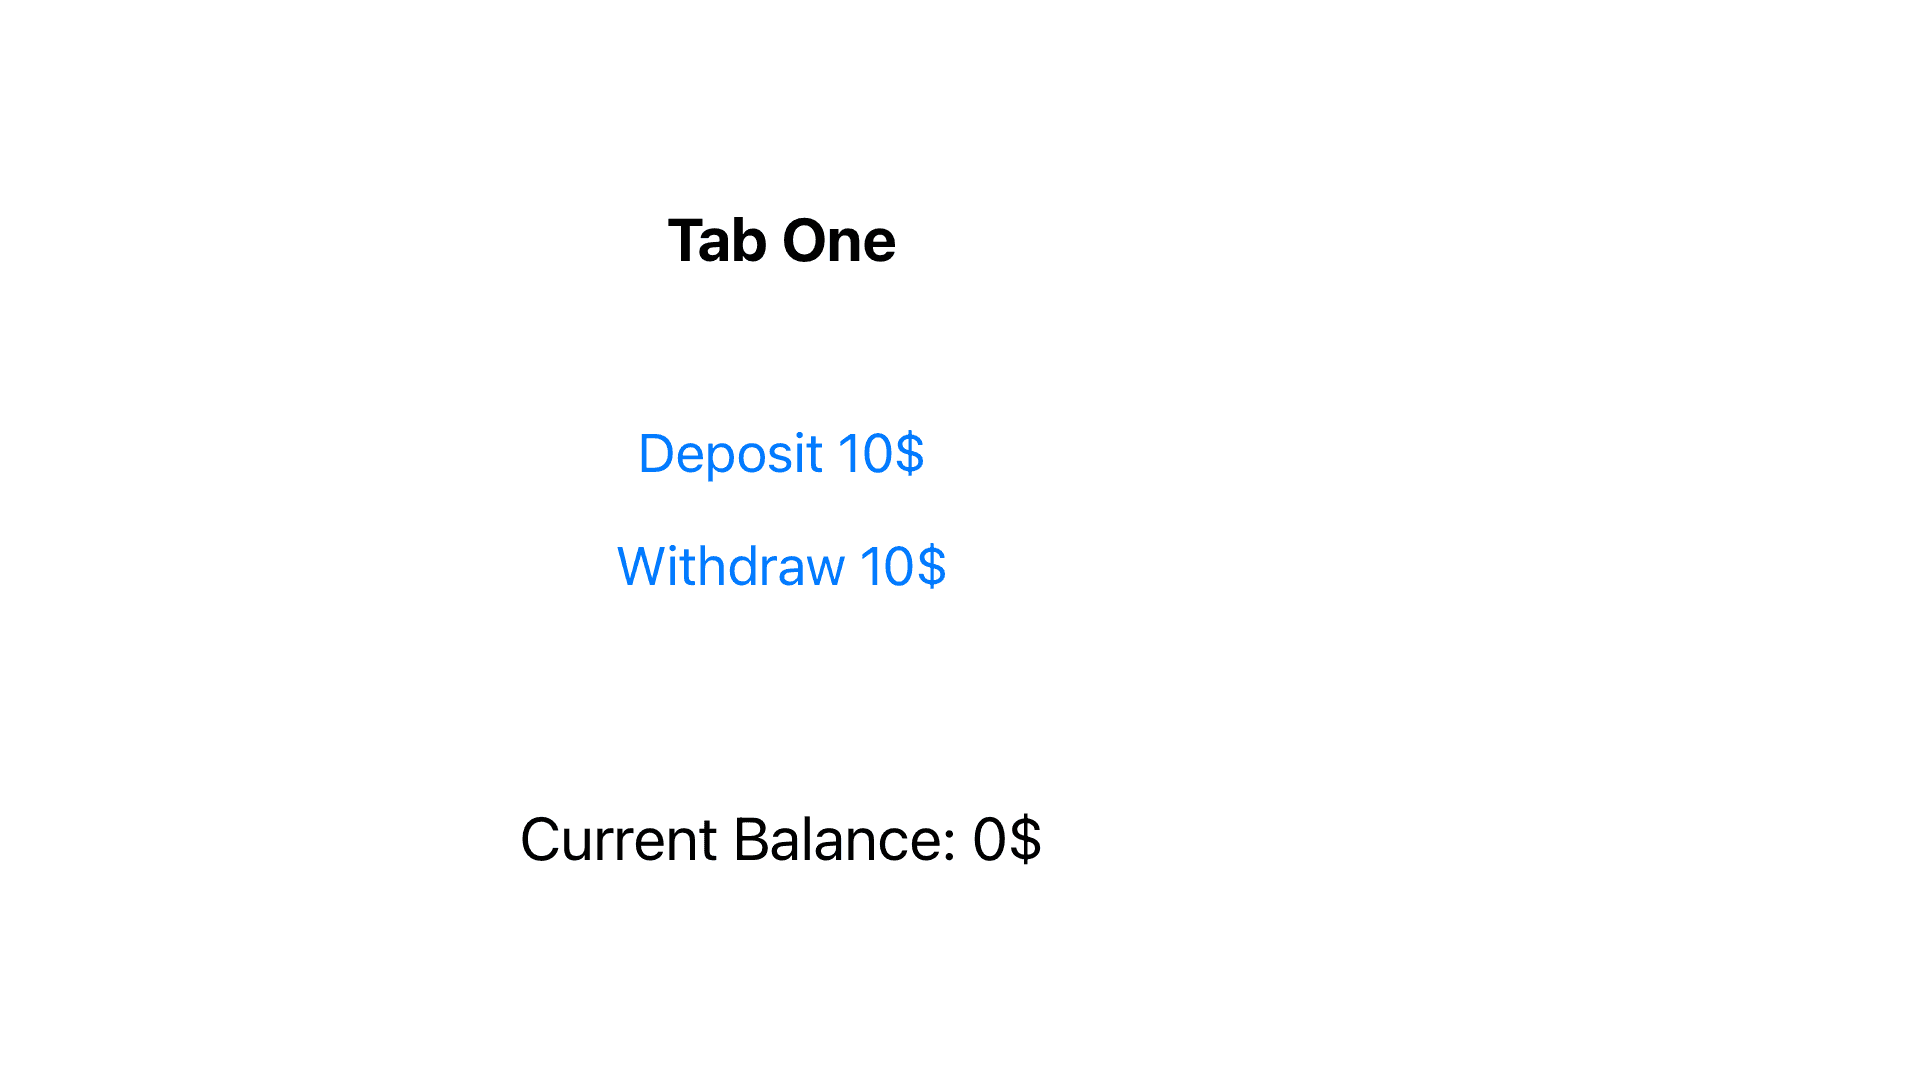
import { StyleSheet, Button } from 'react-native';import { Text, View } from '../components/Themed';import { RootTabScreenProps } from '../types';export default function TabOneScreen({}: RootTabScreenProps<'TabOne'>) {return (<View style={styles.container}><Text style={styles.title}>Tab One</Text><View style={{ marginVertical: 40 }}><Button title="Deposit 10$" onPress={() => {}} /><Button title="Withdraw 10$" onPress={() => {}} /></View><View style={{ marginTop: 20 }}><Text style={{ fontSize: 20 }}>Current Balance: 0$</Text></View></View>);}const styles = StyleSheet.create({container: {flex: 1,alignItems: 'center',justifyContent: 'center',},title: {fontSize: 20,fontWeight: 'bold',},});
This is the UI that we will be working with. We have two buttons, one for deposit and one for withdraw. We also have a text that shows the current balance.
Create the Redux Store
Create a file named store.js in our root directory. Import the configureStore from Redux Toolkit. We'll start by creating an empty Redux store, and exporting it:
import { configureStore } from '@reduxjs/toolkit';export const store = configureStore({reducer: {},});
This creates a Redux store. In order to create a store we need to pass a reducer function to the configureStore function. We will be adding the reducer function in the next step. The reducer is still empty. We will be adding the reducer in the next step.
Provide the Store to the App
Go to App.tsx and import the Provider component from react-redux. Wrap the SafeAreaProvider component with the Provider component. We need to also import our store that we created in our last step. Pass the store prop to the Provider component.
import { store } from './store'import { Provider } from 'react-redux'......export default function App() {......if (!isLoadingComplete) {return null;} else {return (<Provider store={store}><SafeAreaProvider><Navigation colorScheme={colorScheme} /><StatusBar /></SafeAreaProvider></Provider>);}}
Great, our app is now connected to the Redux store. Now let's come to the fun part where we will be adding the actions and the reducers for our balance state.
Create the Balance Slice
Create a file named balanceSlice.js. Import the createSlice API from Redux Toolkit. We will be using the createSlice API to create a slice of the Redux store. A slice is a collection of reducer functions and actions for a specific part of the store. We will be creating a slice for the balance state.
Creating a slice requires a string name to identify the slice, an initial state value, and one or more reducer functions to define how the state can be updated. Once a slice is created, we can export the generated Redux action creators and the reducer function for the whole slice.
Let's create a slice for the balance state. Add the following code to the balanceSlice.js file:
// Import the createSlice API from Redux Toolkitimport { createSlice } from '@reduxjs/toolkit';// This is the initial state of the sliceconst initialState = {value: 0,};export const balanceSlice = createSlice({name: 'balance', // This is the name of the slice, we will later use this name to access the slice from the storeinitialState: initialState, // This is the initial state of the slicereducers: {// All the reducers go heredeposit: (state, action) => {// This is the reducer function for the deposit actionstate.value += action.payload;},withdraw: (state, action) => {// This is the reducer function for the withdraw actionstate.value -= action.payload;},},});// Action creators are generated for each case reducer functionexport const { deposit, withdraw } = balanceSlice.actions;// We export the reducer function so that it can be added to the storeexport default balanceSlice.reducer;
We have created a slice for the balance state. We have also created two action creators, one for deposit and one for withdraw. We have also exported the reducer function so that it can be added to the store. We have previously explain what actions are. What about action creators? Action creators are simply functions that create actions. An action is a plain JavaScript object that has a type field. The type field should be a string that describes the nature of the action. The type field is required. The payload field is optional. The payload field can be any type of data. The payload field is used to pass data to the reducer function.
You should be asking me now where are my type fields and payload fields inside action creators. Well, Redux Toolkit's createSlice function automatically generates action creators that return an action with the correct type and payload. We can see that in the deposit and withdraw action creators. We are passing the payload as an argument to the action creator. The action creator will automatically create an action with the correct type and payload.
Add the Reducer to the Store
Go to store.js and import the balanceSlice reducer. Add the balanceSlice reducer to the reducer object.
import { configureStore } from '@reduxjs/toolkit';import balanceReducer from './balanceSlice';export const store = configureStore({reducer: {balance: balanceReducer,},});
At this point, our balance state is now managed by Redux as a global state. We can access the balance state from anywhere in the app. Let's see how we can access the balance state from the TabOneScreen component.
Access the Balance State
Go to TabOneScreen component and import the useSelector hook from react-redux. We will be using the useSelector hook to access the balance state from the store.
useSelector is a hook that allows you to extract data from the Redux store state, using a selector function. The selector function will be called with the entire Redux store state as its only argument. The selector will be run whenever the function component renders. The selector will also be run whenever the store state changes.
......import { useSelector } from 'react-redux';export default function TabOneScreen({}: RootTabScreenProps<'TabOne'>) {// We use the useSelector hook to access the balance state from the storeconst balance = useSelector((state) => state.balance.value);return (<View style={styles.container}>..........<View style={{ marginTop: 20 }}><Text style={{ fontSize: 20 }}>Current Balance: {balance}$</Text></View></View>);}
You will see that the balance state is now being displayed on the screen as 0$. This is because we have set the initial state of the balance state to 0.
Dispatch Actions
Go to TabOneScreen component and import the useDispatch hook from react-redux. We will be using the useDispatch hook to dispatch actions to the store.
useDispatch is a hook that returns a reference to the dispatch function from the Redux store. You may use it to dispatch actions as needed.
......import { useSelector, useDispatch } from 'react-redux';import { deposit, withdraw } from '../balanceSlice';export default function TabOneScreen({}: RootTabScreenProps<'TabOne'>) {......// We use the useDispatch hook to dispatch actions to the storeconst dispatch = useDispatch();return (<View style={styles.container}>..........<View style={{ marginTop: 20 }}><Text style={{ fontSize: 20 }}>Current Balance: {balance}$</Text></View><View style={{ marginTop: 20 }}><Buttontitle="Deposit"onPress={() => {// We dispatch the deposit action to the store with payload 10dispatch(deposit(10));}}/></View><View style={{ marginTop: 20 }}><Buttontitle="Withdraw"onPress={() => {// We dispatch the withdraw action to the store with payload 10dispatch(withdraw(10));}}/></View></View>);}
Awesome! Now we can dispatch actions to the store. Let's see how the balance state is updated when we dispatch the actions.
Update the Balance State
Go to the app and click on the Deposit button. You will see that the balance state is updated to 10$. Click on the Withdraw button. You will see that the balance state is updated to 0$.
When we dispatch the deposit action, the deposit reducer function is called with payload value as 10. The deposit reducer function updates the balance state by adding the payload to the current balance. Similarly, when we dispatch the withdraw action, the withdraw reducer function is called. The withdraw reducer function updates the balance state by subtracting the payload from the current balance.
Every time the balance state is updated, the TabOneScreen component is re-rendered. This is because we are using the useSelector hook to access the balance state. The useSelector hook is called every time the balance state is updated. The useSelector hook returns the updated balance state and the TabOneScreen component is re-rendered with the updated balance state.
To check if our balance state is available in other components, go to TabTwoScreen component and add the following code:
import { useSelector } from 'react-redux';export default function TabTwoScreen({}: RootTabScreenProps<'TabTwo'>) {// We use the useSelector hook to access the balance state from the storeconst balance = useSelector((state) => state.balance.value);return (<View style={styles.container}><Text style={styles.title}>Tab Two</Text><View style={{ marginTop: 20 }}><Text style={{ fontSize: 20 }}>Current Balance: {balance}$</Text></View></View>);}
Go to the app and click on the Deposit button. You will see that the balance state is updated to 10$ in both the TabOneScreen and TabTwoScreen components. Click on the Withdraw button. You will see that the balance state is updated to 0$ in both the TabOneScreen and TabTwoScreen components.
Bonus: React Native Debugger with Redux Extension
We can use the React Native Debugger to debug our React Native app. This awesome debugger already includes Redux DevTools Extension to debug our Redux store. The advantages of redux devtools are:
- Time travel: go back and forth between the previous and next states of the store
- Jump to a specific state
- Lock the state to prevent it from changing
- Pause the state changes
- Dispatch actions manually
- Inspect the state and actions
- and a lot more
This makes debugging our Redux store very easy. Let's see how we can use the React Native Debugger to debug our Redux store.
Extra Bonus: Persisting our redux store with redux-persist
Now what if we want to store the balance state in the device storage so that we can access it even after the app is closed. We can use redux-persist to persist our redux store. Let's see how we can use redux-persist to persist our redux store.
Install redux-persist
Install redux-persist using the following command:
npm install redux-persist
We will also need to install @react-native-async-storage/async-storage to use AsyncStorage as our storage engine.
npx expo install @react-native-async-storage/async-storage
Create a persistor
Go to store.js. We will do some modifications to set up our redux store with redux-persist.
import { configureStore } from '@reduxjs/toolkit';import { persistStore, persistReducer } from 'redux-persist';import AsyncStorage from '@react-native-async-storage/async-storage';// adding our persist configsconst persistConfig = {key: 'root',version: 1,storage: AsyncStorage,};// adding our rootReducerconst rootReducer = combineReducers({balance: balanceReducer,});// persisting our rootReducerconst persistedReducer = persistReducer(persistConfig, rootReducer);// creating our store and exporting itexport const store = configureStore({reducer: persistedReducer,});
Once our store is created, we need to create a persistor and provide it to our store. Let's go to App.tsx and add the following code:
................import { persistStore } from "redux-persist";import { PersistGate } from "redux-persist/integration/react";import { store } from "./store";let persistor = persistStore(store);export default function App() {............if (!isLoadingComplete) {return null;} else {return (<Provider store={store}><PersistGate loading={null} persistor={persistor}>..........</PersistGate></Provider>);}}
We have imported persistStore and PersistGate from redux-persist. We have also imported our store from store.js. We have created a persistor using the persistStore function and provided it to the PersistGate component. The PersistGate component will wait until the store is persisted and then it will render the app.
To test if our balance state is persisted, deposit or withdraw some amount. Close the app and open it again. You will see that the balance state is persisted and the app is rendered with the persisted balance state.
Conclusion
In this tutorial, we have learned how to use Redux Toolkit to manage the state of our React Native app. We have also learned how to persist our redux store using redux-persist. At the same time we have also learned how to use the React Native Debugger to debug our React Native app, specifically our Redux store. I hope you enjoyed this tutorial!
Source Code
You can find the source code for this tutorial on GitHub