
Introduction
OpenAI just launched ChatGPT - a new AI model that can answer all your questions.
I went deep down the rabbit hole asking the most random question and testing "what else" can ChatGPT answer. After some good hours, my mind was blown 🤯 and I started asking myself how long until even the developers will be replaced by AI.
Fear aside, ChatGPT is truly a very powerful technology that opens the door to so many new opportunities. It makes AI and Machine learning accessible to any developer, even beginers.
Let’s get our hands dirty with ChatGPT, and integrate it into a real project.
What project should we build?
Let’s be lazy, and just ask ChatGPT for some ideas 💡
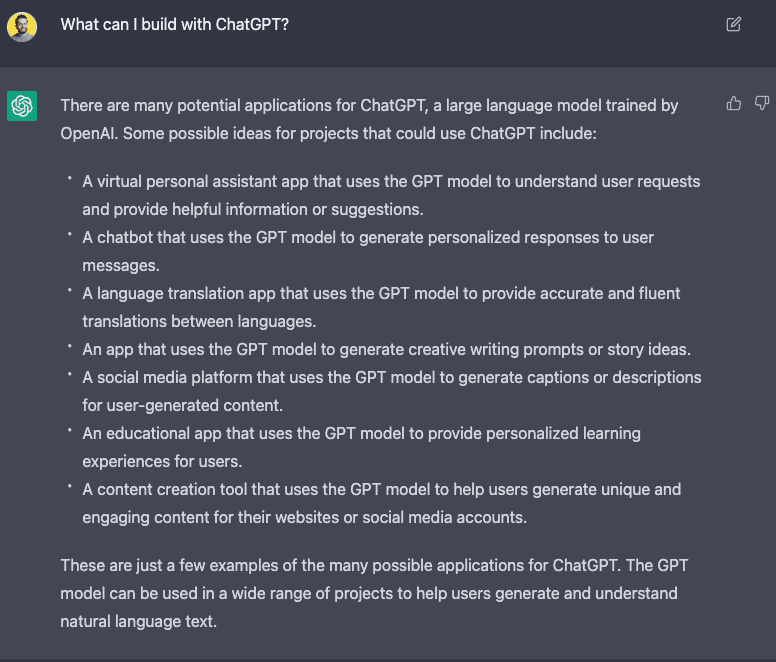
And just like that, we have 7 unique project ideas generated by ChatGPT itself.
The plan
In this tutorial, we'll show you how to use ChatGPT with React Native and NextJS to create a Christmas gift generator that can be used on both the web and mobile platforms.
First, let's take a look at what each of these technologies is and how they work together. ChatGPT is a powerful language model developed by OpenAI that can be used to generate text based on a given input. React Native is a popular JavaScript framework for building native mobile apps, while NextJS is a framework for building server-rendered React apps.
What if I told you this intro was written by ChatGPT?. Have you noticed?
Alright, back to Vadim...
If you want to follow along, and build this application yourself, make sure to download the Asset bundle that contains all the source code, dummy data, pre-defined components, PDF presentation and more.
Download the Asset Bundle 👇
To get the Source Code, PDF guide, dummy data, images, etc.
If you prefer video format, then you can follow the build here:
Now that we are all set up, Let’s get started 🚀
Getting started with ChatGPT
Start by logging in or creating a new account on OpenAI: https://beta.openai.com/signup
Now let’s follow the Quickstart guide together, to get familiar with OpenAI.
-
Clone the repo
BASHgit clone https://github.com/openai/openai-quickstart-node.git -
Create the .env file with your API Key:
JAVASCRIPTOPENAI_API_KEY=<Your API Key> -
Install dependencies
BASHnpm install -
Let’s run the dev server
BASHnpm run dev
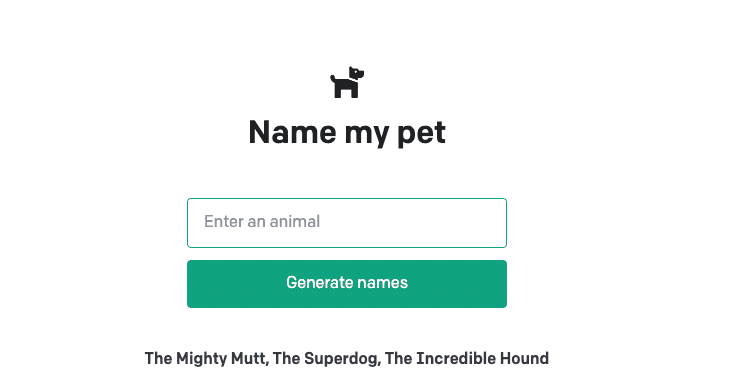
Open http://localhost:3000 and play around with the Pet Generator.
- Let’s also use curl to query the API endpoint.
curl -X POST localhost:3000/api/generate -H "Content-Type: application/json" -d '{"animal": "dog"}'
Christmas Gift Generator 🎅🎁
Let’s use the next prompt to get recommendation of christmass gifts
suggest 3 Christmas gift ideas between 50$ and 100$ for a 30 years old man that is into golfing, business, traveling.
The parameters for this prompt will be:
- Gender
- Age
- Hobbies
- Price (min, max)
Create the API endpoint
We need to create a new endpoint that will generate Christmas gift ideas based on given parameters.
For that, we will create a new file inside the pages/apicalled generate-gifts.js
import { Configuration, OpenAIApi } from 'openai';const configuration = new Configuration({apiKey: process.env.OPENAI_API_KEY,});const openai = new OpenAIApi(configuration);export default async function (req, res) {const { priceMin, priceMax, gender, age, hobbies } = req.body;const completion = await openai.createCompletion({model: 'text-davinci-003',prompt: generatePrompt(priceMin, priceMax, gender, age, hobbies),temperature: 0.6,max_tokens: 2048,});res.status(200).json({ result: completion.data.choices[0].text });}function generatePrompt(priceMin, priceMax, gender, age, hobbies) {return `suggest 3 Christmas gift ideas between ${priceMin}$ and ${priceMax}$ for a ${age} years old ${gender} that is into ${hobbies}.`;}
💡 Files inside the pages/api/ directory are treated as API endpoints. NextJS maps the file name to the endpoint.
By creating a file pages/api/generate-gifts.js, we will be able to do query the https://you-site.com/api/generate-giftsendpoint
Let’s test the endpoint
curl -X POST localhost:3000/api/generate-gifts -H "Content-Type: application/json" -d '{"priceMin": 50, "priceMax": 500, "gender": "woman", "age": 23, "hobbies": "drawing, traveling, coding"}'
WEB UI
Let’s start by creating a new page. For that, we have to create a new file pages/gifts.js and NextJS will render it when accessing the url /gifts
import Head from 'next/head';import React from 'react';import { useState } from 'react';import styles from './index.module.css';export default function Home() {const [gender, setGender] = useState('man');const [age, setAge] = useState(30);const [priceMin, setPriceMin] = useState(25);const [priceMax, setPriceMax] = useState(100);const [hobbies, setHobbies] = useState('');const [loading, setLoading] = useState(false);const [result, setResult] = useState('');async function onSubmit(event) {event.preventDefault();if (loading) {return;}setLoading(true);setResult('');const response = await fetch('/api/generate-gifts', {method: 'POST',headers: {'Content-Type': 'application/json',},body: JSON.stringify({ priceMin, priceMax, gender, age, hobbies }),});const data = await response.json();setResult(data.result.replaceAll('\\n', '<br />'));setLoading(false);}return (<div><Head><title>OpenAI Quickstart</title><link rel="icon" href="/dog.png" /></Head><main className={styles.main}><h3>Christmas gift generator 🎁 💡</h3><form onSubmit={onSubmit}><label>For who is the gift?</label><selectname="gender"value={gender}onChange={(e) => setGender(e.target.value)}><option value="man">Man</option><option value="woman">Woman</option></select><label>Age</label><inputtype="number"min={1}max={99}name="age"placeholder="Enter the age"value={age}onChange={(e) => setAge(Number.parseInt(e.target.value))}/><label>Price from</label><inputtype="number"min={1}name="priceMin"placeholder="Enter the minimum price"value={priceMin}onChange={(e) => setPriceMin(Number.parseInt(e.target.value))}/><label>Price to</label><inputtype="number"min={1}name="priceMax"placeholder="Enter the maximum price"value={priceMax}onChange={(e) => setPriceMax(Number.parseInt(e.target.value))}/><label>Hobbies</label><inputtype="text"name="hobbies"placeholder="Enter the hobbies"value={hobbies}onChange={(e) => setHobbies(e.target.value)}/><input type="submit" value="Generate gift ideas" /></form>{loading && (<div><h3>Looking for the best gift ideas 🎁 💡</h3><img src="/loading.webp" className={styles.loading} /></div>)}<divclassName={styles.result}dangerouslySetInnerHTML={{ __html: result }}/></main></div>);}
Updated styles:
.main .loading {width: 50;}.main input[type="text"],.main input[type="number"],.main select {padding: 12px 16px;border: 1px solid #10a37f;border-radius: 4px;margin-bottom: 12px;margin-top: 4px;}
Upload the project to Github
Let’s stage and commit all our changes first
git add .git commit -m "gift generator
Now, head to Github and create a new repository.
Back in our project, go ahead and update the url of our local repository to point to the newly created repo on Github
git remote set-url origin <your repo url>
Now that we have the GitHub repo, we can use it to deploy our project to vercel.
Deploy to Vercel
This is an optional step, and you will be able to continue with the tutorial even with the local environment. However, it’s so easy to deploy a NextJS app using vercel, that I wanted to show you how to do it.
Open Vercel dashboard, and connect your new repository.
Don’t forget to add the OPENAI_API_KEY environment variable.
Leave everything else by default, and press Deploy.
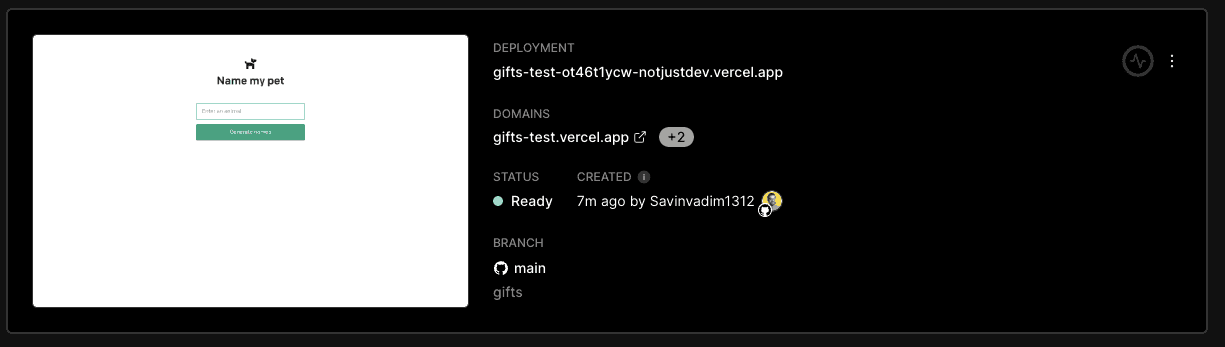
After that is done, we can access the url of our project from anywhere in the world.
Mobile app with React Native and Expo
For the mobile application we will use Expo because it’s fast, easy and convenient.
Let’s start by bootstrapping the project using create-expo-app
npx create-expo-app GiftIdeasMobile
Now open the project in your editor of choice to start working on the app.
Open a new terminal inside the root directory of the project, and let’s run the development server
npm start
Now we can run the app on either Android by pressing a inside the terminal, or on iOS by pressing i. You can also use the Expo Go app on your physical device, and scan the QR code to run the app on your phone.
Form management
Let’s start by rendering a similar form that we have on the web.
Because we will have the same form, we can copy all the state variables from our web project in App.js. That’s the benefit of using React on the web and React Native for mobile. We can reuse a lot of code.
const [gender, setGender] = useState('man');const [age, setAge] = useState(30);const [priceMin, setPriceMin] = useState(25);const [priceMax, setPriceMax] = useState(100);const [hobbies, setHobbies] = useState('');const [loading, setLoading] = useState(false);const [result, setResult] = useState('');
For every input, we will use a Text component for the label and a TextInput component for the input.
<Text style={styles.label}>Age</Text><TextInputplaceholder="Age"keyboardType="numeric"style={styles.input}value={age.toString()}onChangeText={(s) => setAge(Number.parseInt(s))}/>
Let’s give it some styles
input: {fontSize: 16,borderColor: "#353740;",borderWidth: 1,borderRadius: 4,padding: 16,marginTop: 6,marginBottom: 12,},label: {fontSize: 16,color: "gray",},
Now that we have one input, we can duplicate it for the rest of our inputs
<Text style={styles.label}>Age</Text><TextInputplaceholder="Age"keyboardType="numeric"style={styles.input}value={age.toString()}onChangeText={(s) => setAge(Number.parseInt(s))}/><Text style={styles.label}>Price from ($)</Text><TextInputplaceholder="Price from"keyboardType="numeric"style={styles.input}value={priceMin.toString()}onChangeText={(s) => setPriceMin(Number.parseInt(s))}/><Text style={styles.label}>Price to ($)</Text><TextInputplaceholder="Price to"keyboardType="numeric"style={styles.input}value={priceMax.toString()}onChangeText={(s) => setPriceMax(Number.parseInt(s))}/><Text style={styles.label}>Hobbies</Text><TextInputplaceholder="Hobbies"style={styles.input}value={hobbies}onChangeText={setHobbies}/>

Custom switch for the gender
For the gender selector, we will build a simple custom picker using 2 Text components
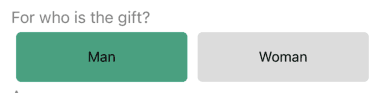
First, Render the genders in a Text component, and group the together inside a View
<Text style={styles.label}>For who is the gift?</Text><View style={styles.selectorContainer}><Text style={styles.selector}>Man</Text><Text style={styles.selector}>Woman</Text></View>
And style them
//selectorselectorContainer: {flexDirection: "row",},selector: {flex: 1,textAlign: "center",backgroundColor: "gainsboro",margin: 5,padding: 16,borderRadius: 5,overflow: "hidden",},
Now, highlight the selected option with a different background color, and handle the onPress event of the Text component to update the selected option.
<TextonPress={() => setGender("man")}style={[styles.selector,gender === "man" && { backgroundColor: "#10a37f" },]}>Man</Text><TextonPress={() => setGender("woman")}style={[styles.selector,gender === "woman" && { backgroundColor: "#10a37f" },]}>Woman</Text>
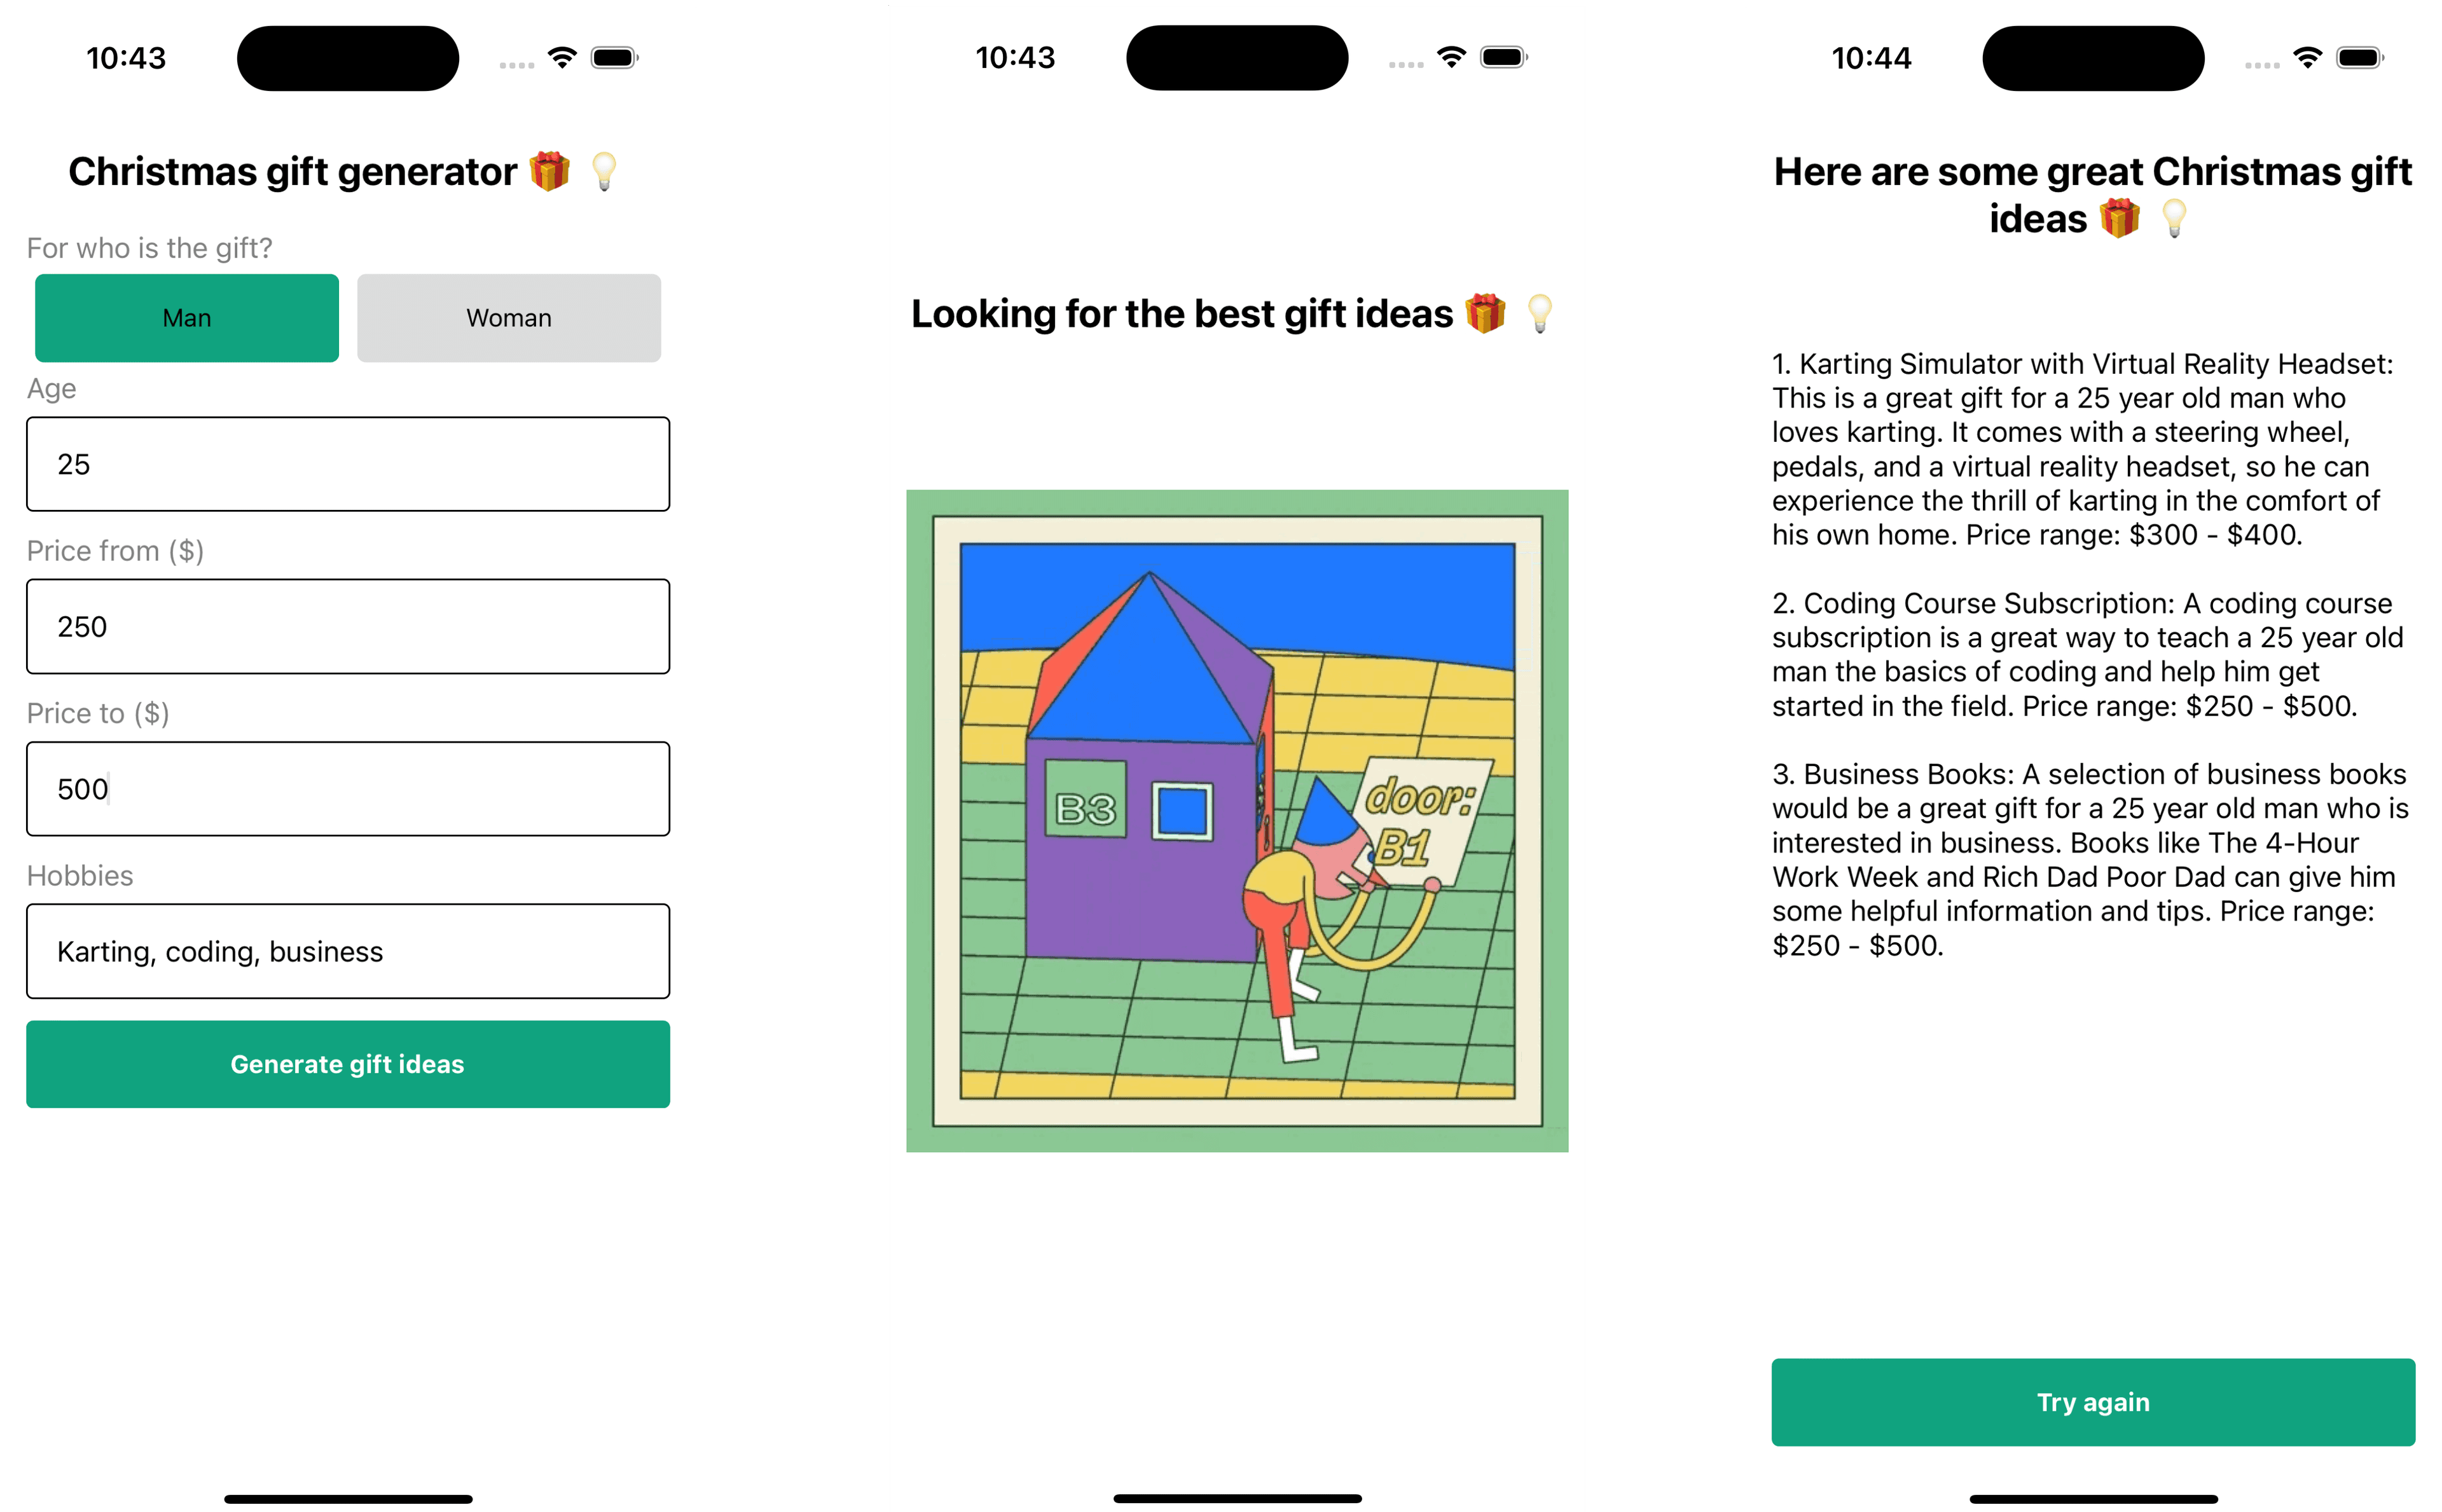
If everything is correct, this is what you should see now
Submit form
Render the button
<Pressable onPress={onSubmit} style={styles.button}><Text style={styles.buttonText}>Generate gift ideas</Text></Pressable>button: {marginTop: "auto",backgroundColor: "#10a37f",padding: 16,borderRadius: 4,alignItems: "center",marginVertical: 6,},buttonText: {color: "white",fontWeight: "bold",},
Now that we have all the form fields and the button rendered on the screen, let’s implement the onSubmit logic. Again, we can use the web version of the submit function, and do minor adjustments for the mobile platform.
const onSubmit = async () => {if (loading) {return;}setLoading(true);setResult('');try {const response = await fetch(`${API_URL}/generate-gifts`, {method: 'POST',headers: {'Content-Type': 'application/json',},body: JSON.stringify({ priceMin, priceMax, gender, age, hobbies }),});const data = await response.json();setResult(data.result);} catch (e) {Alert.alert("Couldn't generate ideas", e.message);} finally {setLoading(false);}};
Make sure to create a global variable API_URL and set the url of your deployed app from vercel.
const API_URL = '<https://gifts-test.vercel.app/api>';
In case you didn’t deploy the app, you can use your local environment. For that, make sure to run the NextJS app, and for the mobile application, use the [localhost](<http://localhost>) url
const API_URL = '<http://localhost:3000/api>';
Loading and Results
When the user is waiting for the response, it would be great to show a loading screen.
if (loading) {return (<View style={styles.loadingContainer}><Text style={styles.title}>Looking for the best gift ideas 🎁 💡</Text><Imagesource={loadingGif}style={styles.loading}resizeMode="contain"/></View>);}loadingContainer: {alignItems: "center",justifyContent: "center",flex: 1,padding: 10,},loading: {width: "100%",},
After we receive the response from the API, we should render it on the screen.
const onTryAgain = () => {setResult('');};if (result) {return (<SafeAreaView style={styles.container}><Text style={styles.title}>Here are some great Christmas gift ideas 🎁 💡</Text><Text style={styles.result}>{result}</Text><Pressable onPress={onTryAgain} style={styles.button}><Text style={styles.buttonText}>Try again</Text></Pressable></SafeAreaView>);}
Demo of the Mobile App
That’s it for the mobile application. We have a basic but functional app that can generate gift ideas based on user input.
Ideas to improve the Christmas Gift Generator
- Add more parameters to the query
- Pair it with a image search API (ex: Unsplash) and provide images for every idea
- Make it generic, not only for Christmas
- Save ideas
- Recommend links where you can buy these gifts
- Can be used as the business model using affiliate links
Conclusion
In conclusion, using ChatGPT with React Native and NextJS is a powerful combination for building a cross-platform AI app. Whether you're building a gift generator or another type of app, these technologies make it easy to create a user-friendly, feature-rich app that can be used on both the web and mobile platforms.