
Introduction
Build a Books App with React Native
In this tutorial, we will build a Books App similar to GoodReads that will allow users to search for books and keep track of the books that they have read. For that, we will use:
- React Native with Expo for the mobile application
- Google Books API
- Open Library API
- StepZen to build a GraphQL API, using above mentioned public REST APIs
- Apollo Client to query the API from React Native
- Async Storage to persist data on the device storage
If you want to follow along, and build this application yourself, make sure to download the Asset bundle that contains all the dummy data, pre-defined compontents, PDF presentation and more.
Download the Asset Bundle 👇
To get the Source Code, PDF guide, dummy data, images, etc.
If you prefer video format, then you can follow the build here:
Now that we are all set up, Let’s get started 🚀
Create a GraphQL API in minutes
As we said, we are going to use Google Books and Open Library APIs to get the data about books. These APIs are public, and you don’t need an API key to work with them.
These are REST APIs, and here we can see an example of the search query endpoint:
https://www.googleapis.com/books/v1/volumes?q=React+Native
Working with 2 different REST APIs in the same application is quite a challenge. That’s why, we are going to use StepZen to setup a GraphQL API and then easily query our GraphQL API from our application.
This tutorial is sponsored by StepZen. StepZen is a GraphQL server with a unique architecture that helps developers build APIs fast and with less code (using declarative configurations).
In simple words, StepZen helps you build one GraphQL API from multiple sources: different APIs, databases, micro-services, etc. And that’s exactly what we need today.
Get started with StepZen
-
Create a Free StepZen account here
-
Install cli and login
BASHnpm install -g stepzenstepzen login -a oneontaCheck out the Getting Started guide for more information
-
Import the Google API
BASHstepzen import curl \"<https://www.googleapis.com/books/v1/volumes?q=harry&country=US>" \--query-name googleBooksSearch \--query-type GoogleRoot \--prefix Google \--name GoogleBooks -
Import the Open Library api
BASHstepzen import curl \"<http://openlibrary.org/search.json?q=the+lord+of+the+rings>" \--query-name openLibrarySearch \--query-type OpenLibraryRoot \--prefix OL \--name OpenLibrary -
Start the server
BASHstepzen start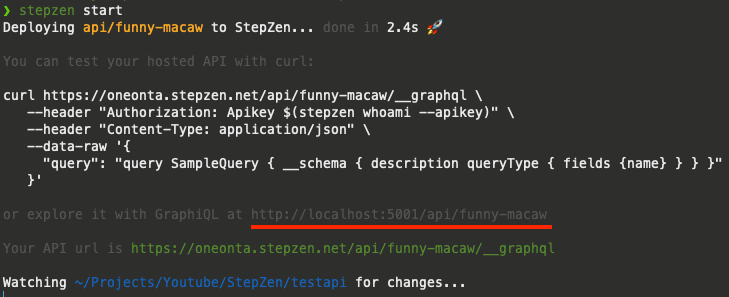
Explore the API
Expore the API by clicking on the highlighted link above
-
Let’s add the next query
GRAPHQLquery SearchBooks($q: String) {googleBooksSearch(q: $q, country: "US") {items {idvolumeInfo {authorsaverageRatingdescriptionimageLinks {thumbnail}titlesubtitleindustryIdentifiers {identifiertype}}}}openLibrarySearch(q: $q) {docs {author_nametitlecover_edition_keyisbn}}} -
and this Query variables
JSON{"q": "React Native"} -
Now we can press Play at the top to execute our query. In the right pannel, we should see the response to our query.
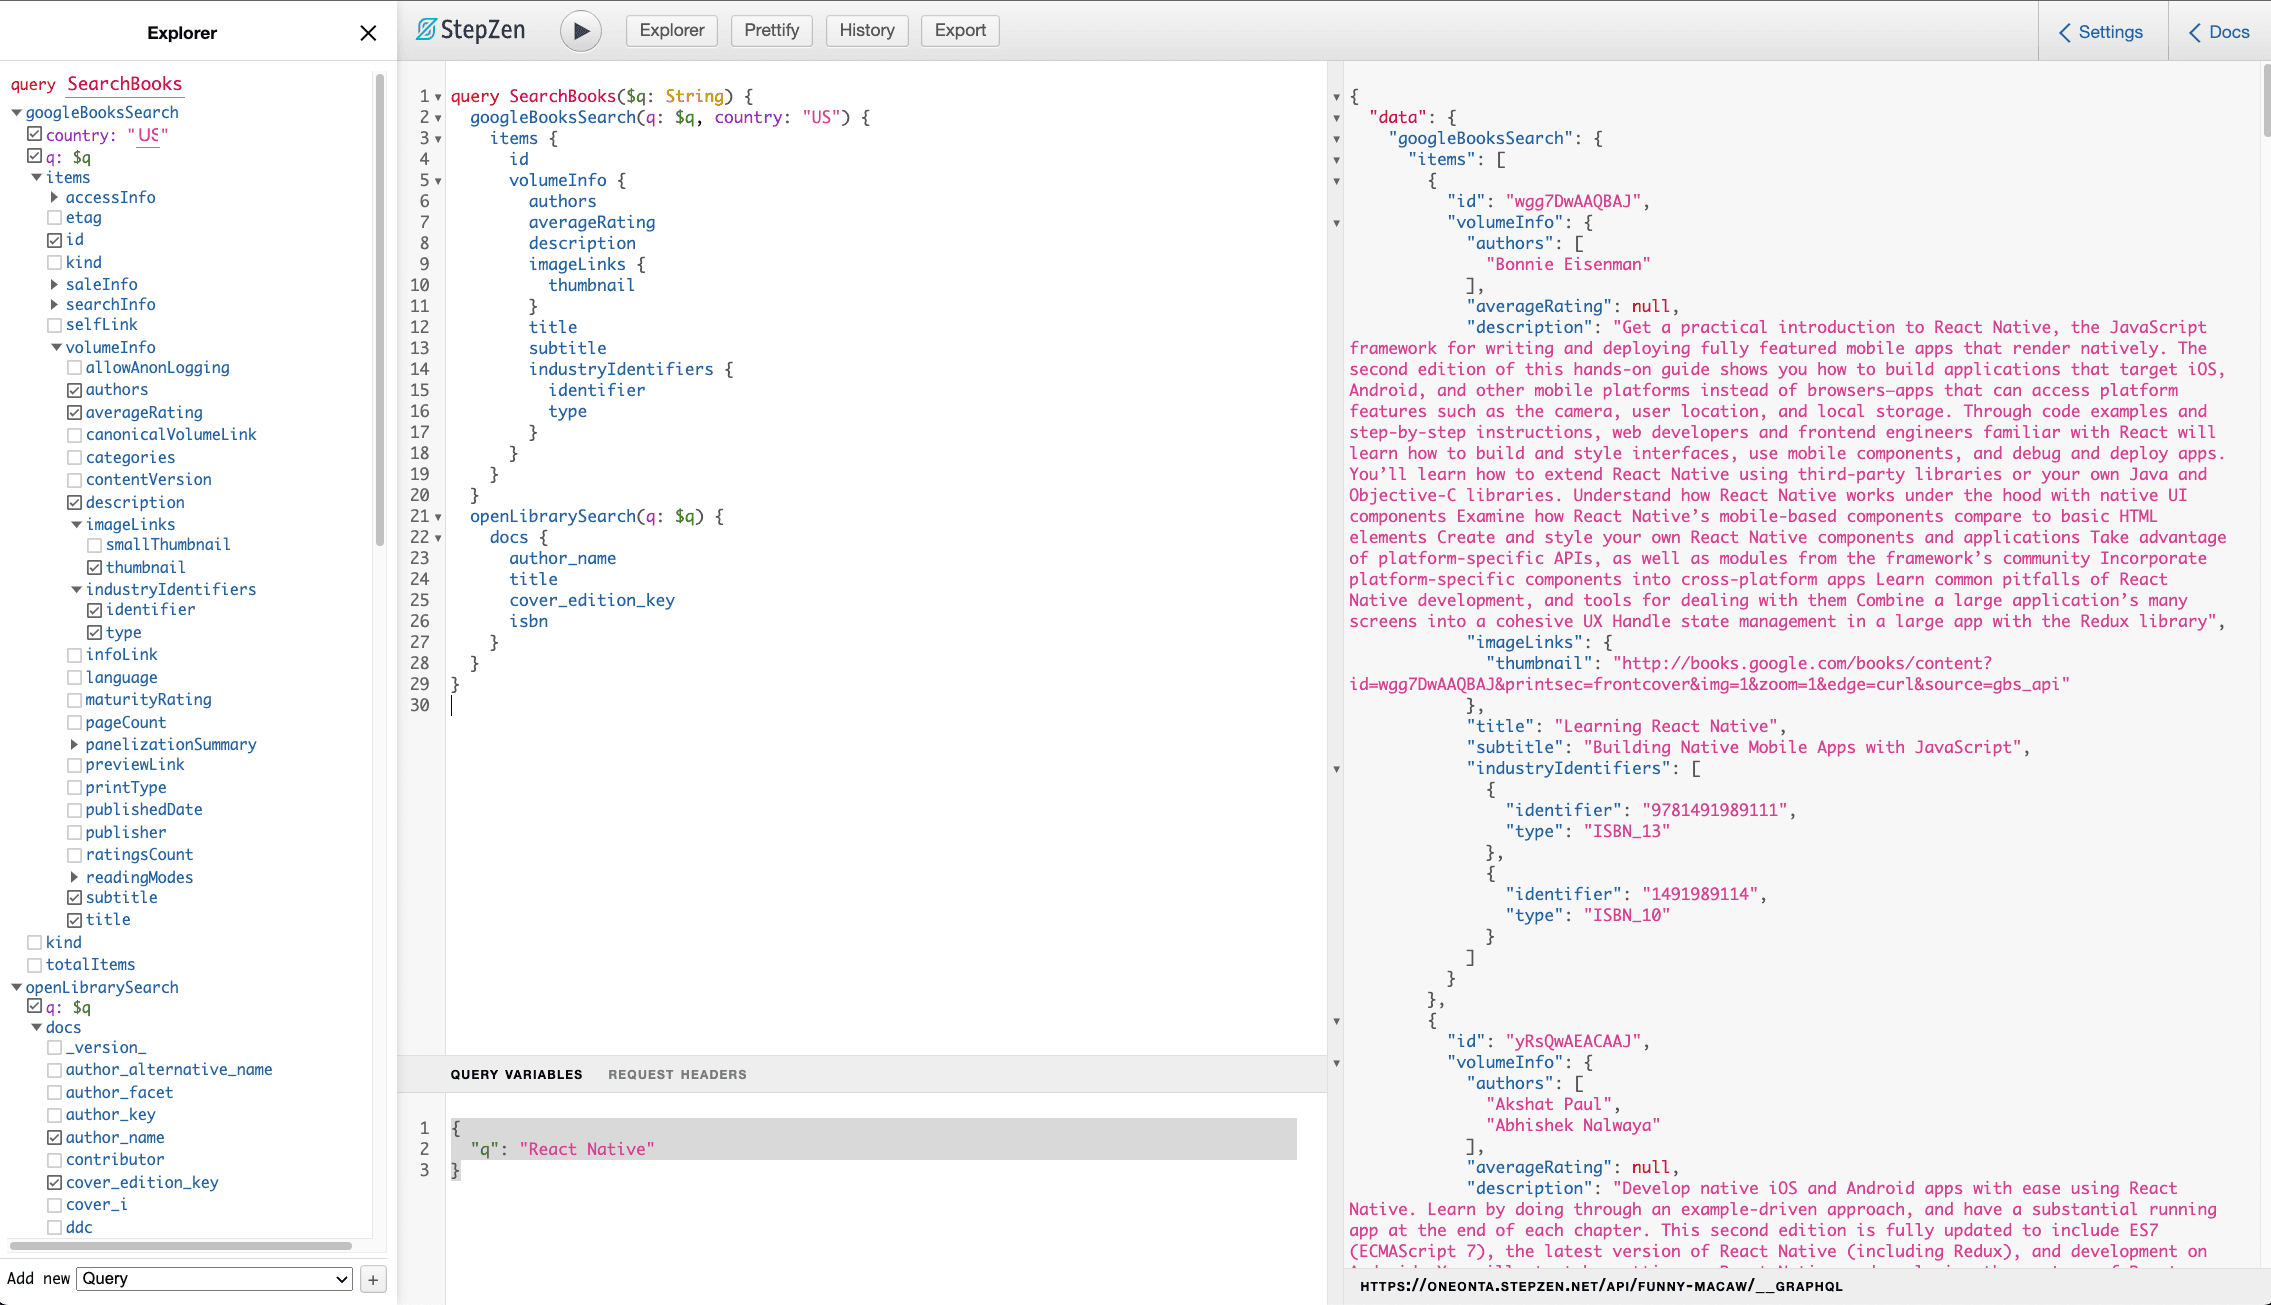
And that’s it for our backend. That’s how easy it is to build a GraphQL API using StepZen.
Mobile Application
Set up a new application using Expo
-
initialize app
BASHnpx create-expo-app BooksMobile --template tabs -
Change the tint color inside constants/Colors.ts
JAVASCRIPTconst tintColorLight = "#46AA71";
Get started with Apollo Client
-
Install and setup apollo Integrating with React Native
BASHnpx expo install @apollo/client graphql -
Setup apollo inside App.tsx
JAVASCRIPTimport { ApolloClient, InMemoryCache, ApolloProvider } from "@apollo/client";const API_KEY = "<YOUR_API_KEY>";// Initialize Apollo Clientconst client = new ApolloClient({uri: "<https://oneonta.stepzen.net/api/good-deer/__graphql>",headers: {Authorization: `Apikey ${API_KEY}`,},cache: new InMemoryCache(),});...<ApolloProvider client={client}><Navigation colorScheme={colorScheme} /></ApolloProvider>🔐 Get the api key by running stepzen whoami --apikey in the command line
-
Let’s query the books inside screens/TabOneScreen.tsx
JAVASCRIPTconst query = gql`query SearchBooks($q: String) {googleBooksSearch(q: $q, country: "US") {items {idvolumeInfo {authorsaverageRatingdescriptionimageLinks {thumbnail}titlesubtitleindustryIdentifiers {identifiertype}}}}openLibrarySearch(q: $q) {docs {author_nametitlecover_edition_keyisbn}}}`;export default function TabOneScreen({navigation,}: RootTabScreenProps<'TabOne'>) {const { data, loading, error } = useQuery(query, {variables: { q: 'React Native' },});console.log(JSON.stringify(data, null, 2));return (<View style={styles.container}>{loading && <ActivityIndicator />}{error && (<View style={styles.container}><Text style={styles.title}>Error fetching books</Text><Text>{error.message}</Text></View>)}</View>);}
Render a list of Books
-
Now, let’s create a file called Book.d.tsthat will store our global types
JAVASCRIPTtype Book = {image: string,title: string,authors: string[],isbn: string,}; -
Create a new component components/BookItem.tsx
JAVASCRIPTimport { View, Text, StyleSheet, Image } from "react-native";import React from "react";type BookItemProps = {book: Book;};const BookItem = ({ book }: BookItemProps) => {return (<View style={styles.container}><Image source={{ uri: book.image }} style={styles.image} /><View style={styles.contentContainer}><Text style={styles.title}>{book.title}</Text><Text>by {book.authors?.join(", ")}</Text></View></View>);};const styles = StyleSheet.create({container: {flexDirection: "row",marginVertical: 10,},image: {flex: 1,aspectRatio: 2 / 3,marginRight: 10,},contentContainer: {flex: 4,borderColor: "lightgray",borderBottomWidth: 0.5,},title: {fontSize: 16,fontWeight: "500",},});export default BookItem; -
Render a list of books inside screens/TabOneScreen.tsx
JAVASCRIPT<FlatListdata={data?.googleBooksSearch?.items || []}renderItem={({ item }) => (<BookItembook={{title: item.volumeInfo.title,image: item.volumeInfo.imageLinks.thumbnail,authors: item.volumeInfo.authors,}}/>)}showsVerticalScrollIndicator={false}/> -
Add the Input Box, and switch to a LazyQuery
JAVASCRIPTconst [search, setSearch] = useState('');const [runQuery, { data, loading, error }] = useLazyQuery(query);<View style={styles.header}><TextInputvalue={search}onChangeText={setSearch}placeholder="Search..."style={styles.input}/><Buttontitle="Search"onPress={() => runQuery({ variables: { q: search } })}/></View>;...header: {flexDirection: "row",alignItems: "center",},input: {flex: 1,borderWidth: 1,borderColor: "gainsboro",borderRadius: 5,padding: 10,marginVertical: 5,}💡 A Lazy query allows us to execute the query based on a user event, in this case, when the user presses the Search button.
-
Add 2 tabs for Google Books and Open Library
JAVASCRIPTconst [provider, setProvider] = useState<"googleBooksSearch" | "openLibrarySearch">("googleBooksSearch");const parseBook = (item) => {if (provider === "googleBooksSearch") {return {title: item.volumeInfo.title,image: item.volumeInfo.imageLinks?.thumbnail,authors: item.volumeInfo.authors,isbn: item.volumeInfo.industryIdentifiers?.[0]?.identifier,};} else {return {title: item.title,authors: item.author_name,image: `https://covers.openlibrary.org/b/olid/${item.cover_edition_key}-M.jpg`,isbn: item.isbn?.[0],};}};...<View style={styles.tabs}><Textstyle={provider === "googleBooksSearch"? { fontWeight: "bold", color: "royalblue" }: {}}onPress={() => setProvider("googleBooksSearch")}>Google Books</Text><Textstyle={provider === "openLibrarySearch"? { fontWeight: "bold", color: "royalblue" }: {}}onPress={() => setProvider("openLibrarySearch")}>Open Library</Text></View>...<FlatListdata={provider === "googleBooksSearch"? data?.googleBooksSearch?.items: data?.openLibrarySearch?.docs || []}renderItem={({ item }) => <BookItem book={parseBook(item)} />}showsVerticalScrollIndicator={false}/>...// stylestabs: {flexDirection: "row",justifyContent: "space-around",alignItems: "center",height: 50,},
My Books
We are going to use React Context API to store the details about my books, and to be able to use this data in different places in the application.
-
For that, create a new file context/MyBooksProvider.tsx
JAVASCRIPTimport { createContext, useContext, ReactNode, useState } from "react";type MyBooksContextType = {onToggleSaved: (book: Book) => void;isBookSaved: (book: Book) => boolean;savedBooks: Book[];};const MyBooksContext = createContext<MyBooksContextType>({onToggleSaved: () => {},isBookSaved: () => false,savedBooks: [],});type Props = {children: ReactNode;};const MyBooksProvider = ({ children }: Props) => {const [savedBooks, setSavedBooks] = useState<Book[]>([]);const areBooksTheSame = (a: Book, b: Book) => {return JSON.stringify(a) === JSON.stringify(b);};const isBookSaved = (book: Book) => {return savedBooks.some((savedBook) => areBooksTheSame(savedBook, book));};const onToggleSaved = (book: Book) => {if (isBookSaved(book)) {// remove from savedsetSavedBooks((books) =>books.filter((savedBook) => !areBooksTheSame(savedBook, book)));} else {// add to savedsetSavedBooks((books) => [book, ...books]);}};return (<MyBooksContext.Provider value={{ onToggleSaved, isBookSaved, savedBooks }}>{children}</MyBooksContext.Provider>);};export const useMyBooks = () => useContext(MyBooksContext);export default MyBooksProvider; -
Now we can use MyBooksContext inside our screens. For that, we can use the exported custom hook called useMyBooks.
Let’s get the neceserry function from the context Inside components/BookItem.tsx
JAVASCRIPTconst { onToggleSaved, isBookSaved } = useMyBooks();const saved = isBookSaved(book); -
Now we can add a button that will call onToggleSaved()
JAVASCRIPT<Pressablestyle={[styles.button, saved ? { backgroundColor: 'lightgray' } : {}]}onPress={() => onToggleSaved(book)}><Text style={styles.buttonText}>{saved ? 'Remove' : 'Want to Read'}</Text></Pressable>
Render my books
-
Inside screens/TabTwoScreen.tsx let’s use the useMyBooks() hook and get access the the list of ISBNs that we saved
JAVASCRIPTexport default function TabTwoScreen() {const { savedBooks } = useMyBooks();return (<View style={styles.container}><FlatListdata={savedBooks}renderItem={({ item }) => <BookItem book={item} />}/></View>);}const styles = StyleSheet.create({container: {flex: 1,padding: 10,},});
Persisting data
To persist data on the device storage, we are going to use Async Storage.
-
Install Async Storage
BASHnpx expo install @react-native-async-storage/async-storage -
Import
JAVASCRIPTimport AsyncStorage from '@react-native-async-storage/async-storage'; -
Create a function persistData that will write our saved books to AsyncStorage
JAVASCRIPTconst persistData = async () => {await AsyncStorage.setItem('booksData', JSON.stringify(savedBooks));}; -
Create a function loadData that will read and parts data from the AsyncStorage
JAVASCRIPTconst loadData = async () => {const dataString = await AsyncStorage.getItem('booksData');if (dataString) {const items = JSON.parse(dataString);setSavedBooks(items);}setLoaded(true);}; -
Now, using useEffect we will load and persistData when necesery.
-
When the components mounts, we want to load data
JAVASCRIPTuseEffect(() => {loadData();}, []); // empty deps array to trigger the effect ONLY when mountingb. When savedBooks data from state changes, we want to persist it to storage
JAVASCRIPTuseEffect(() => {if (loaded) {persistData();}}, [savedBooks]); // trigger the effect when savedBooks change
Refactoring
-
Let’s change the tab bar titles and icons
-
Tab One
- name="Search"
- icon: search
-
Tab Two
- name="My Books"
- icon: book
-
_initialRouteName_="Search"
-
Rename:
- TabOneScreen to SearchScreen
- TabTwoScreen to MyBooksScren
-
Hide the header on Search Screen
- Add headerShown: false in the options object of the SearchScreen
- Wrap our SearchScreen.tsx inside a SafeAreaView
JAVASCRIPT<SafeAreaView edges={['top']} style={styles.container}>...</SafeAreaView>
Challenges for you
The learning doesn’t stop here. The best learning is when you go that extra mile. When you try something on your own. That’s why, here are some ideas how you can improve this application
- Add multiple shelves for my books (want to read, currently reading, already read)
- Add cusom shelves that users can add and manage
- Add the details page of the book and show more information about them
- Merge books from different APIs in the same list
- Ratings
- Gamification:
- How many books you have read (this month, year, etc)
- Reading challenges
More advance features:
- Auth layer to let users create accounts
- Save user data (ex: shelves, my books) in a database
Conclusion
I hope you enjoyed this tutorial as much as I enjoyed creating it.
If you learned something new today, make sure to share this tutorial with your network.
We are trying to help more developers out there, and your help is highly appreciated 🙏